 宇田 龍矢(Tatsuya Uda)のブログ

こんにちは、うだたつやです。
Notionブログが最高すぎて、解説記事を書きたくなりました。
この記事では、「 Notionをブログにできるって本当? 」「 Notionをブログにしたい!でも、プログラミングが必要なの?大変そう…。 」という方に向けて、実際にNotionをブログ化した筆者が、 Notionをブログとして公開する方法をわかりやすく解説します。
結論から言うと、 プログラミングは一切不要 で、かなり簡単にNotionブログを始められます。今回は、 誰でも簡単にNotionを独自ドメインに乗せて公開できる Super というサービスを紹介します。
▼NotionをWebサイト化できるSuperはこちらから
Notionをブログにするメリット
そもそも、なぜNotionをブログとして使うのか?
▼Notionをブログにするメリットは以下の通り
- ブログの更新が楽
- 書くのが楽しい
- Notionには余計な機能が無い
ブログの更新がスーパー楽になる
Notionをブログ化させると、 ブログの更新がめちゃめちゃ楽です。
なぜ更新が楽なのかというと、 文章を書き始めるまでが早いから なんですよね。
例えば、ワードプレスやはてなブログでブログを作っても、 ログインして執筆までのハードルが高いです。 せっかくブログを作ったけど、2,3記事書いてから全く更新してません。という方も多いと思います。
その点、 NotionならPCやスマホでアプリを立ち上げっぱなしにしておけば、常時起動して、サッと書き始められます。
書くのが楽しい
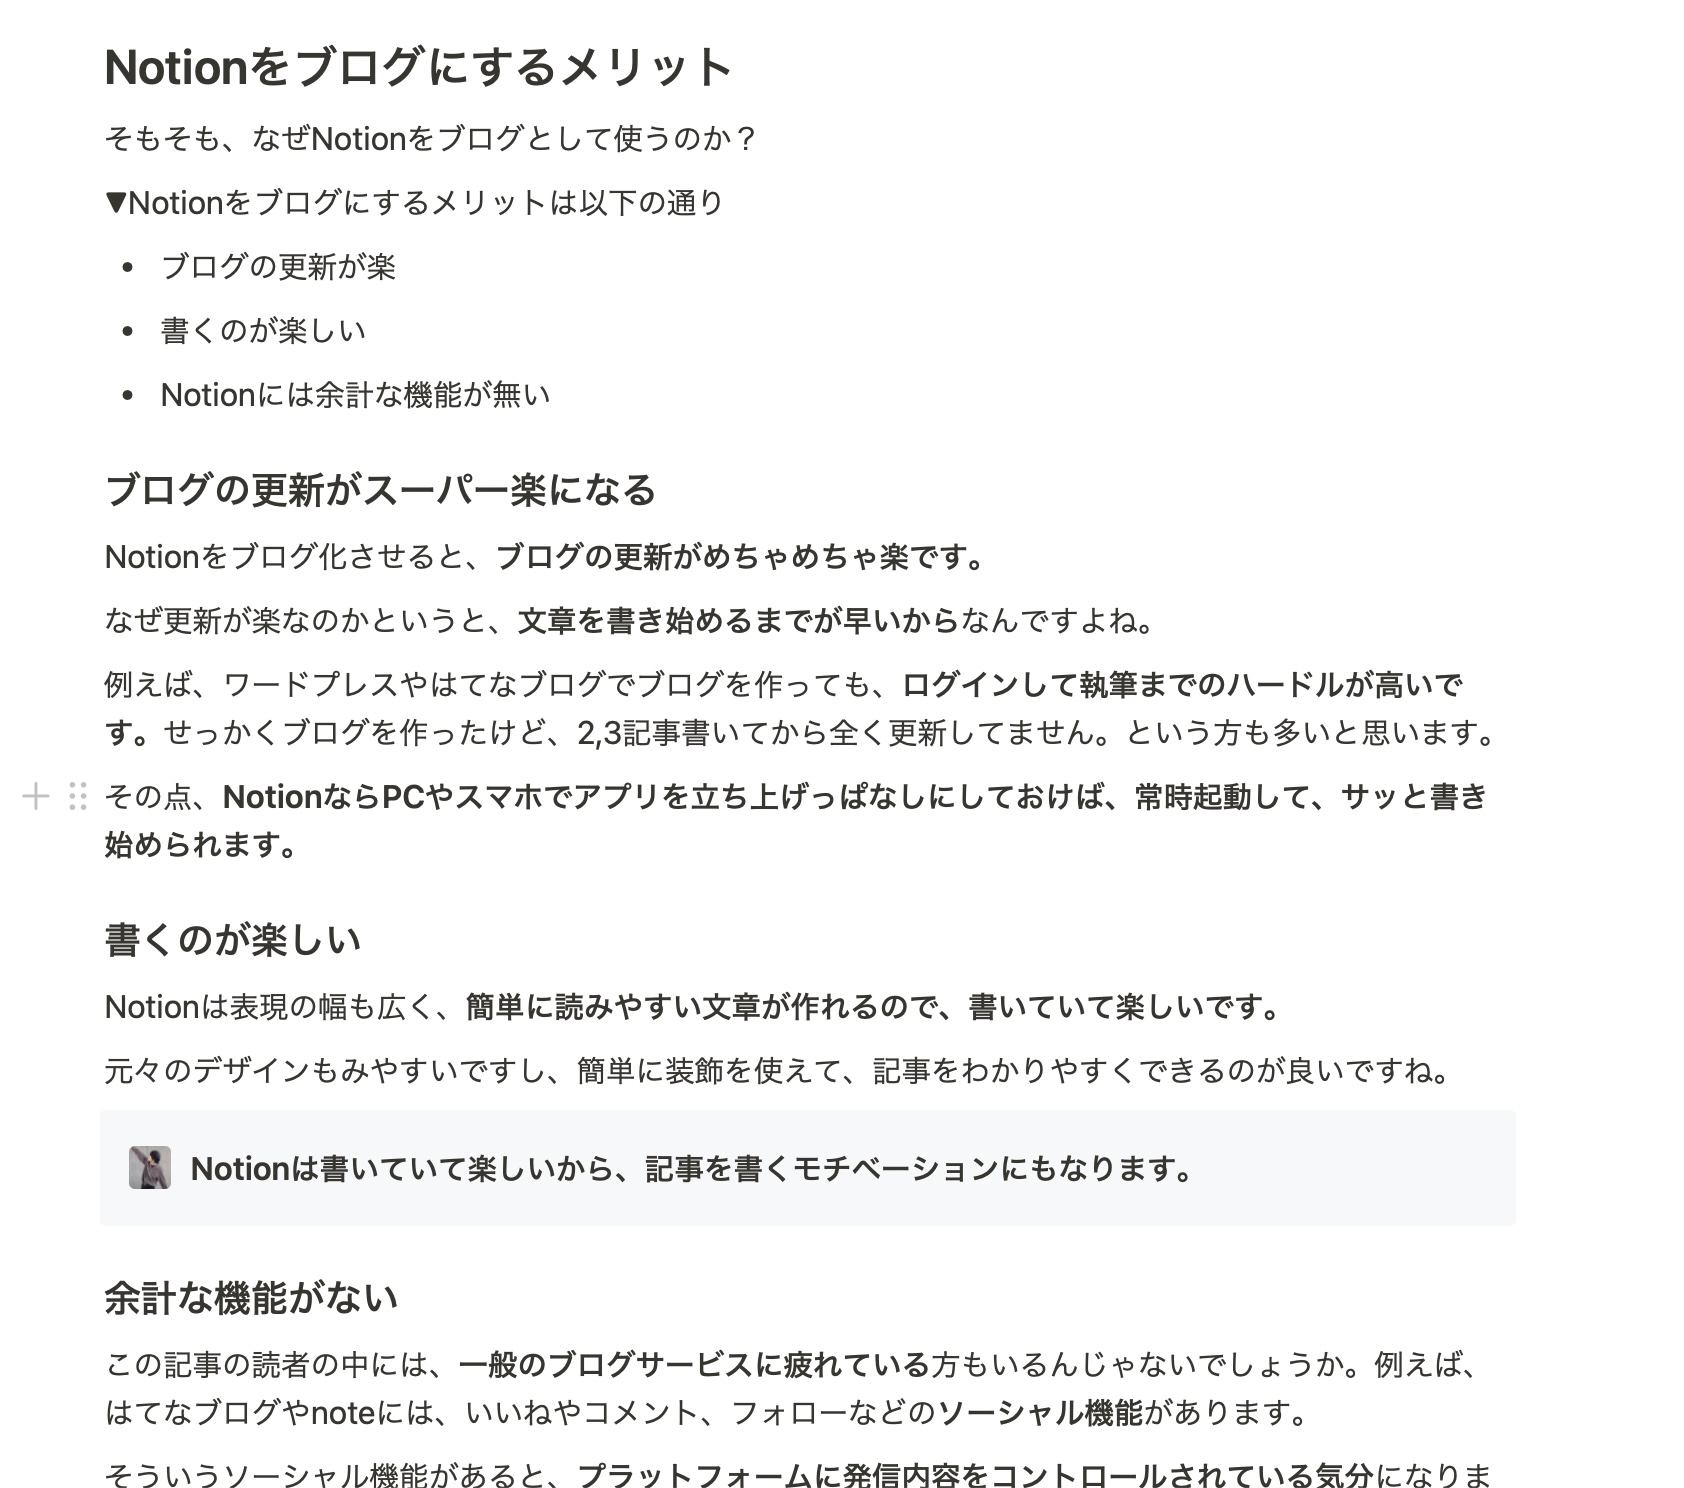
Notionは表現の幅も広く、 簡単に読みやすい文章が作れるので、書いていて楽しいです。
元々のデザインもみやすいですし、簡単に装飾を使えて、記事をわかりやすくできるのが良いですね。
余計な機能がない
この記事の読者の中には、 一般のブログサービスに疲れている 方もいるんじゃないでしょうか。例えば、はてなブログやnoteには、いいねやコメント、フォローなどの ソーシャル機能 があります。
そういうソーシャル機能があると、 プラットフォームに発信内容をコントロールされている気分 になります。いいねがつかないと落ち込んだり、フォロワーを増やすために戦略的な投稿をしたり。
Noitonブログには余計な機能がないため、ただただ文章を書くことに集中できます。
Superとは
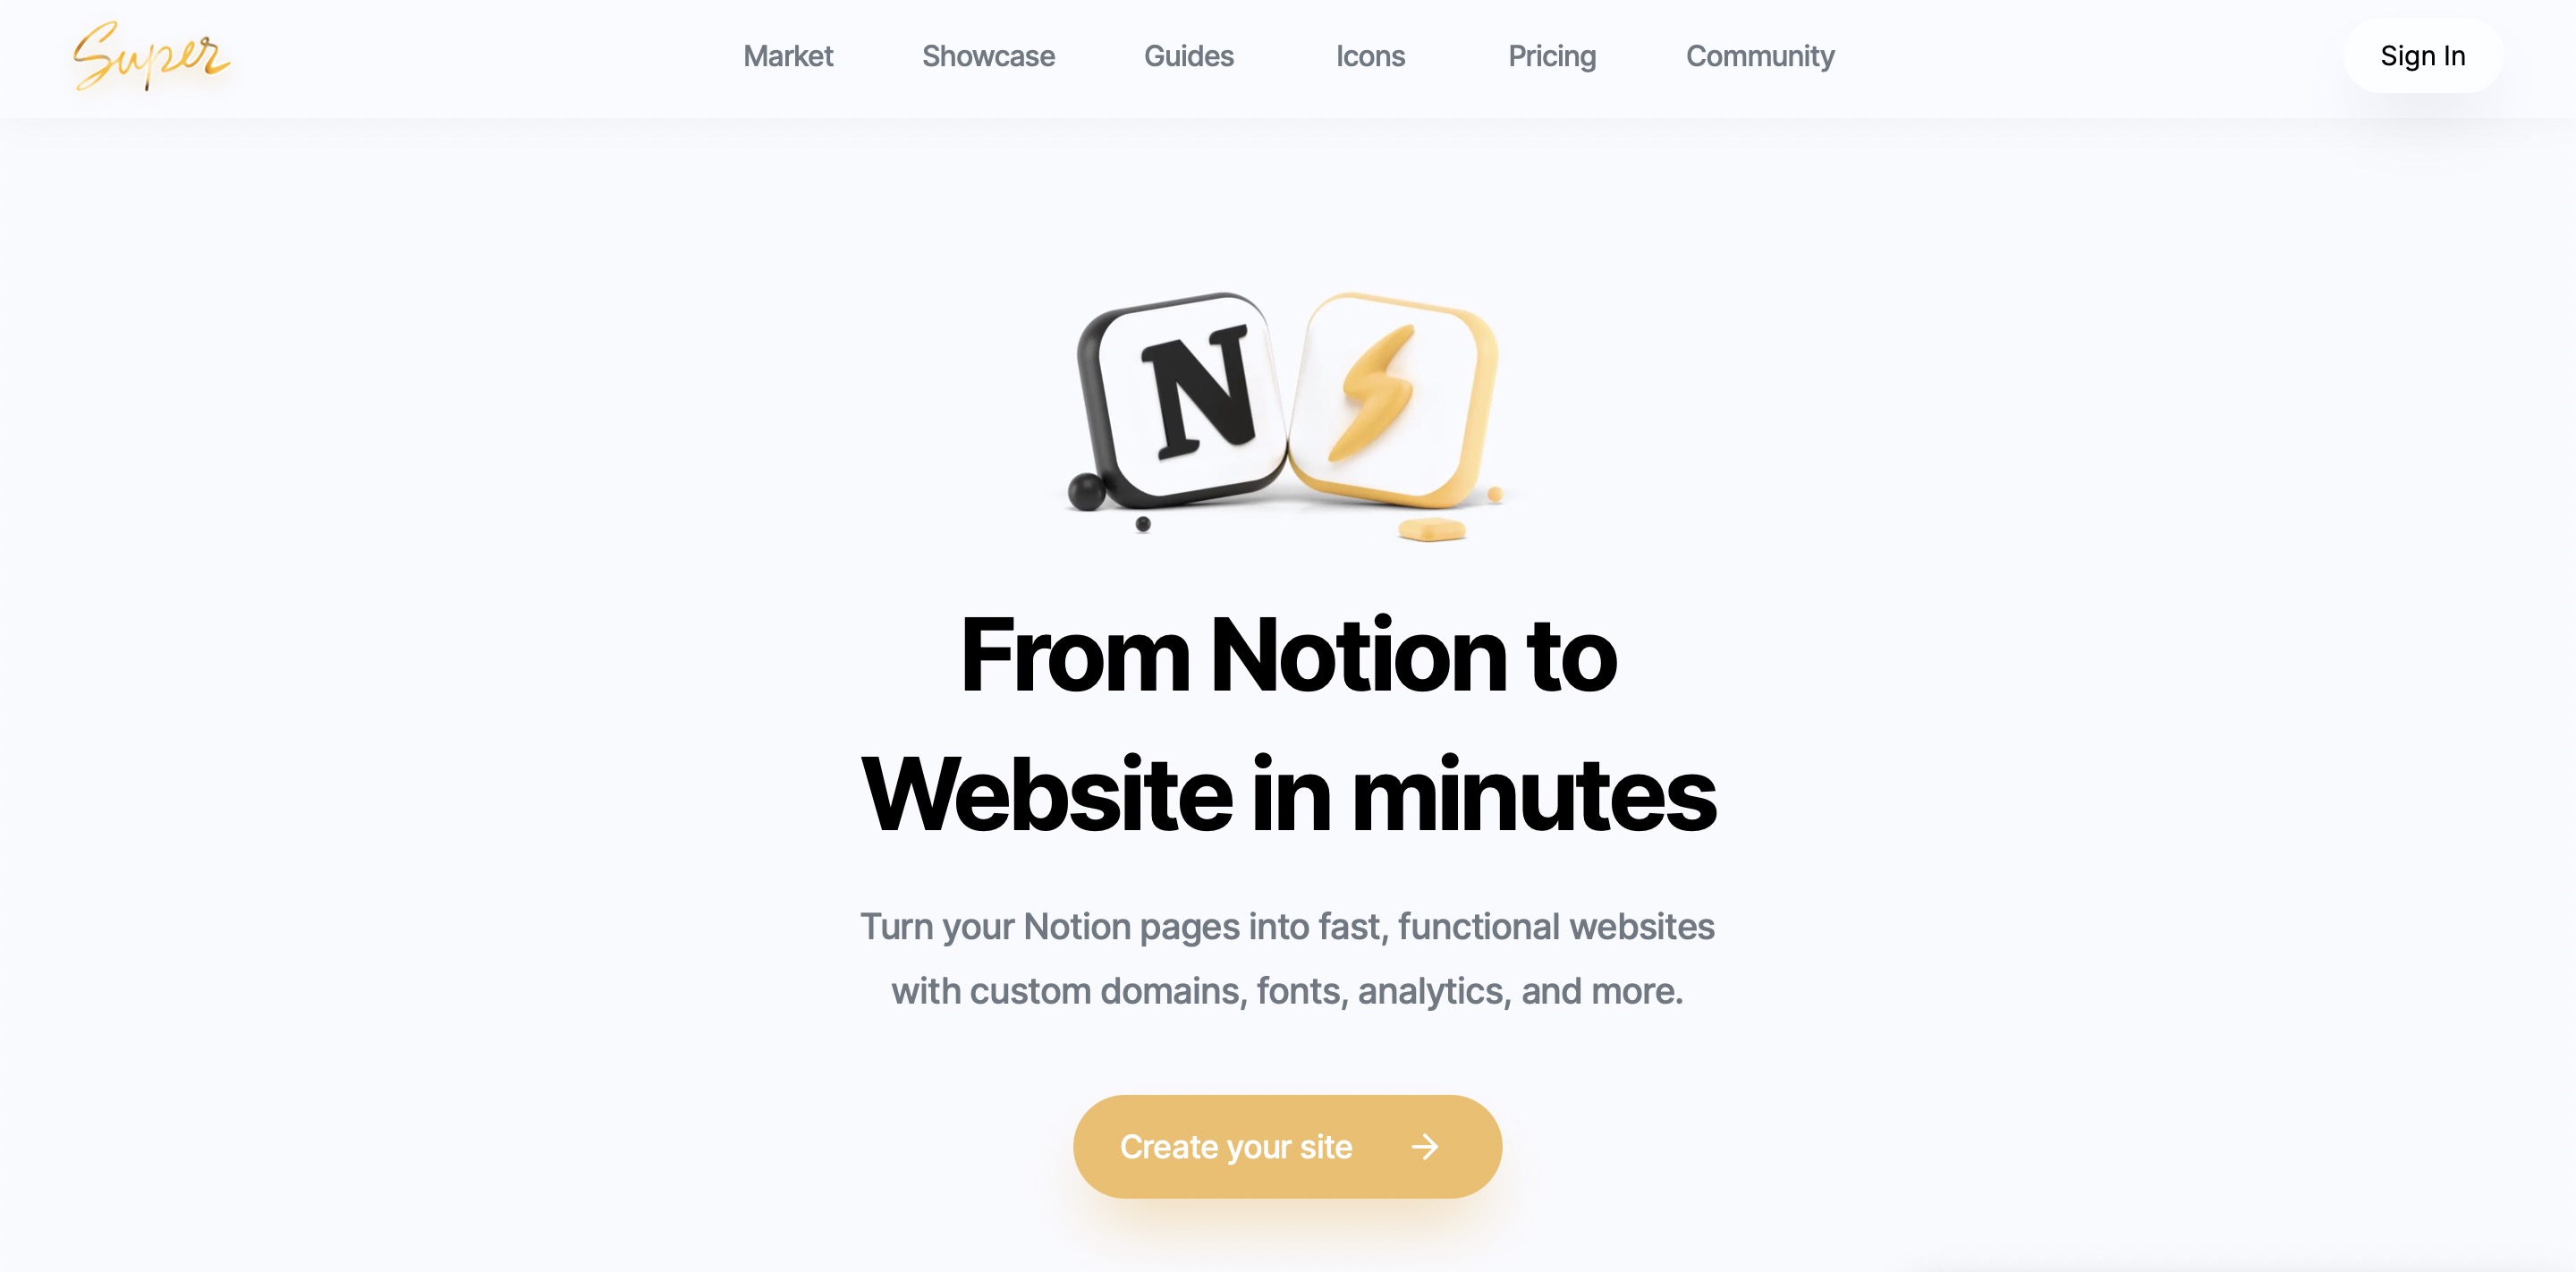
Superは、NotionをそのままWebサイトとして公開できるツールです。
- 独自ドメイン&SSL(https)対応。
- 設定が簡単。だれでも10分で公開できる。
- 読み込み速度が速い
- ページ遷移速度が超速い
- カスタムCSS / JS対応
- Googleアナリティクスも導入可能
- フォント変更可能
- メタタグの設定可能
- favicon設定可能
など、重要な機能はほとんど揃ってます。
▼Superの公式サイトはこちら
NotionをWordPressのように使える
もう少し専門的に言うと、Superは、いわゆるSSG(静的サイトジェネレーター)の自動ホスティングサービスです。 NotionをCGMとして使える ところが最大のメリットですね。
よく分からない方は、 NotionをWordPressみたいに使える と考えれば大丈夫です。
Superの類似サービス
他にもいくつかNotionをwebサイト化するツールはありますが、Superが1番人気があり、使いやすそうだったのでSuperを選びました。
類似サービス一覧
Super
$12/月
Anotion
980円/月(日本)
Notion2Site
$8/月
Notelet
$7/月
HostNotion
$5/月
Anotionは、日本人の方が開発者で日本語でサービス提供されています。Superはサイトが全て英語のため、英語に不安のある方はAnotionもおすすめです。
初級編:SuperでNotionをブログとして公開する方法
まずは、 Super の公式サイトから黄色の Create your site をクリックしましょう。

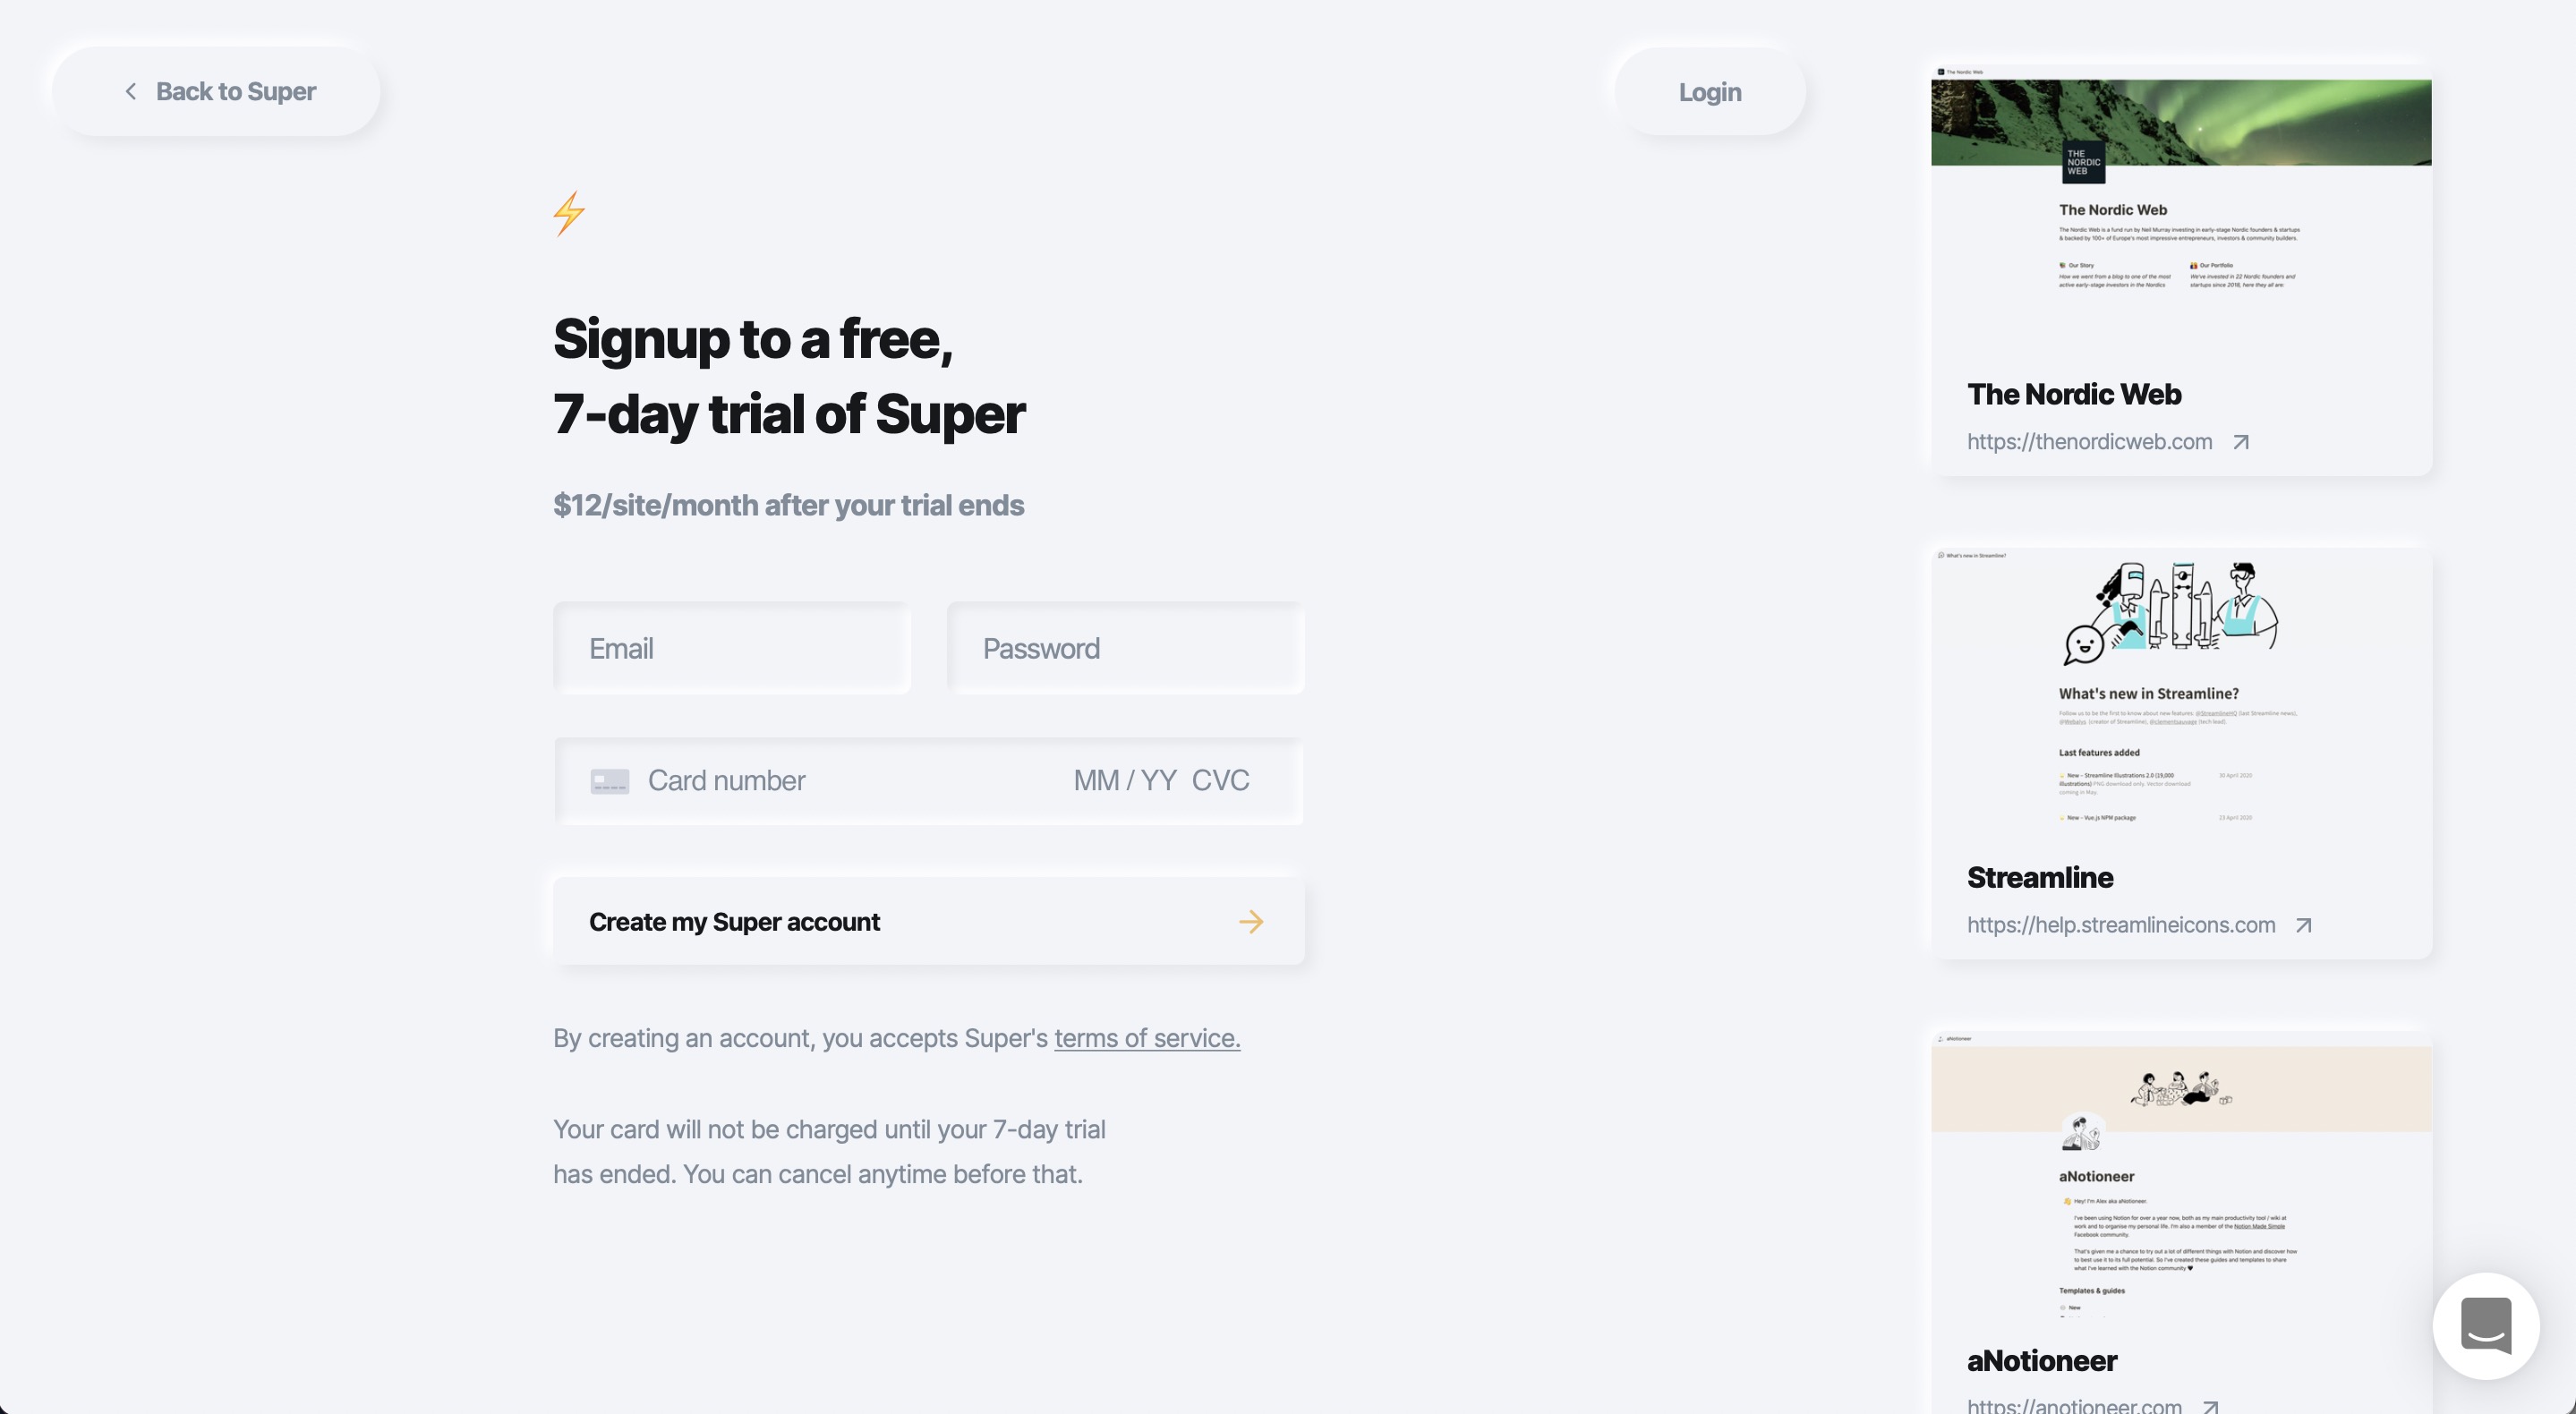
アカウント作成
アカウント作成画面に飛ぶので、Superにログインする際に使用するメールアドレス、パスワードと、決済に使うクレジットカード番号を入力してください。
サイト登録
Superのアカウントが作成できたら、Notionのサイト設定に進みましょう。
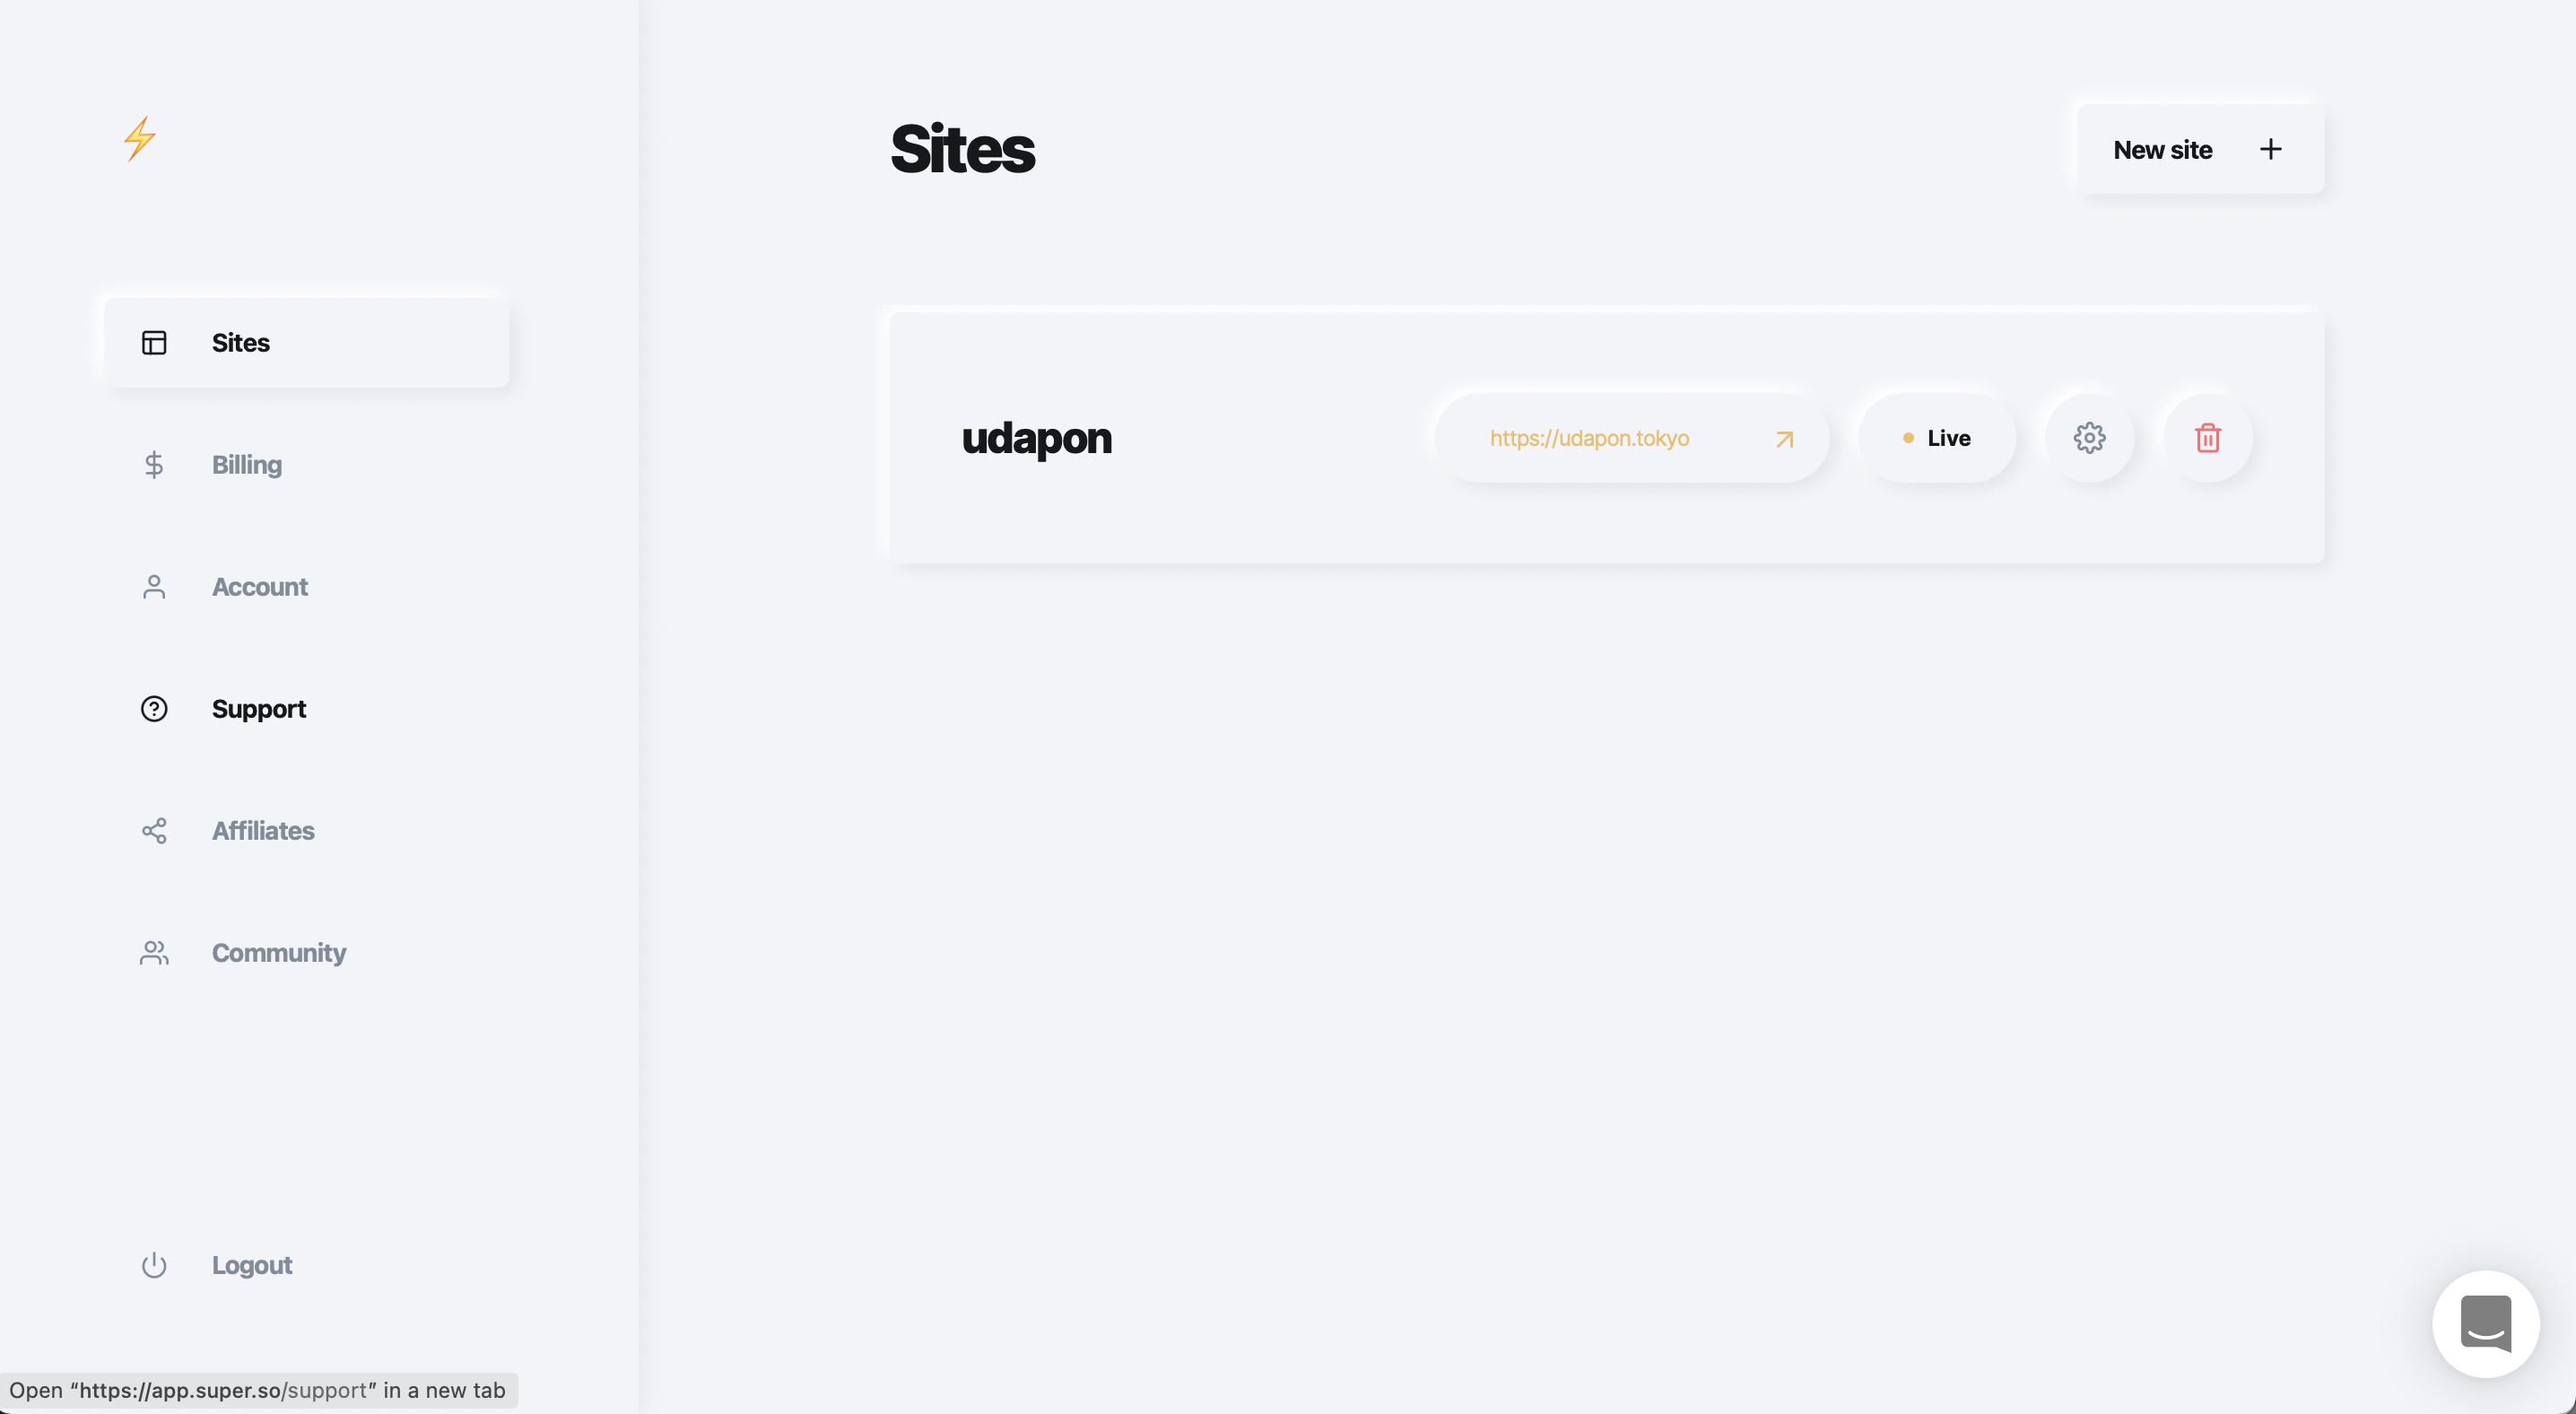
右上の New site ボタンをクリックして、公開したいサイトの設定に進みましょう。
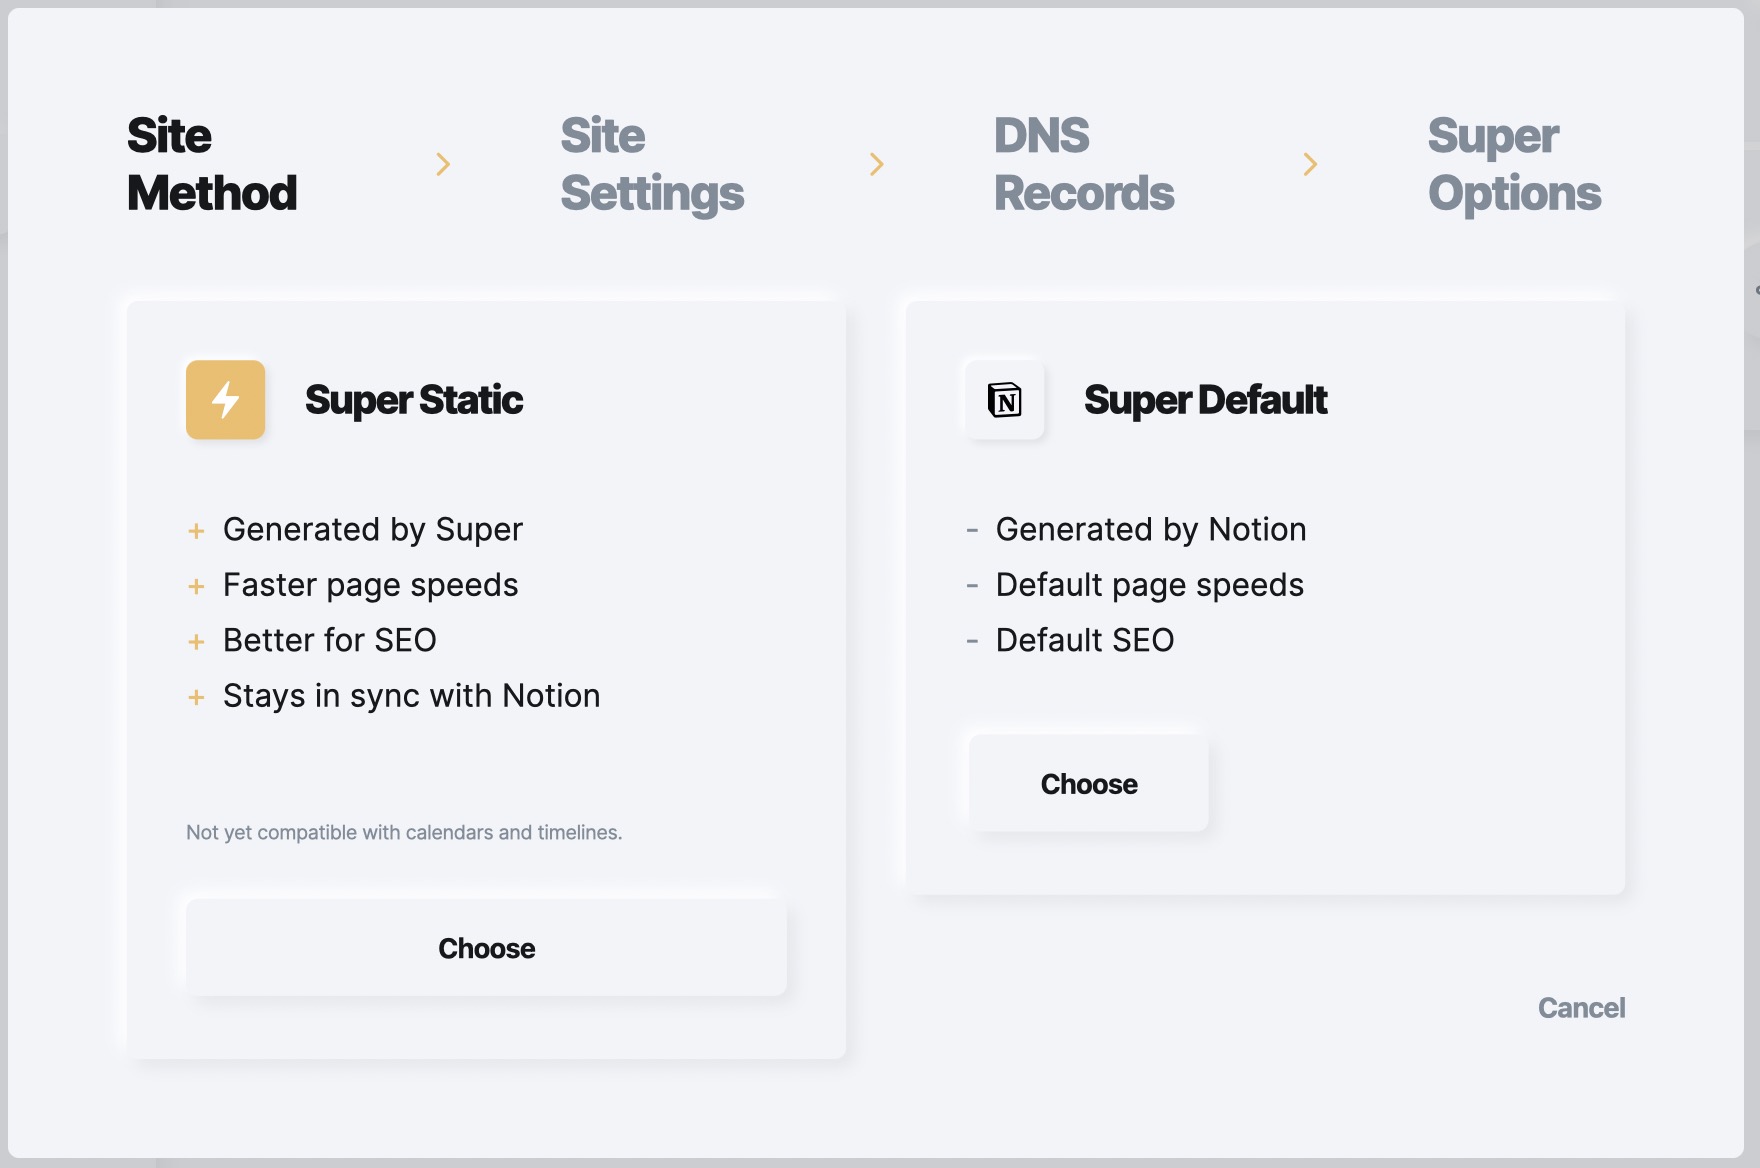
Site Methodの選択
Site Method は左の Super Static を選びましょう。
Site Setting
ここでは、サイトの基本的な設定ができます。
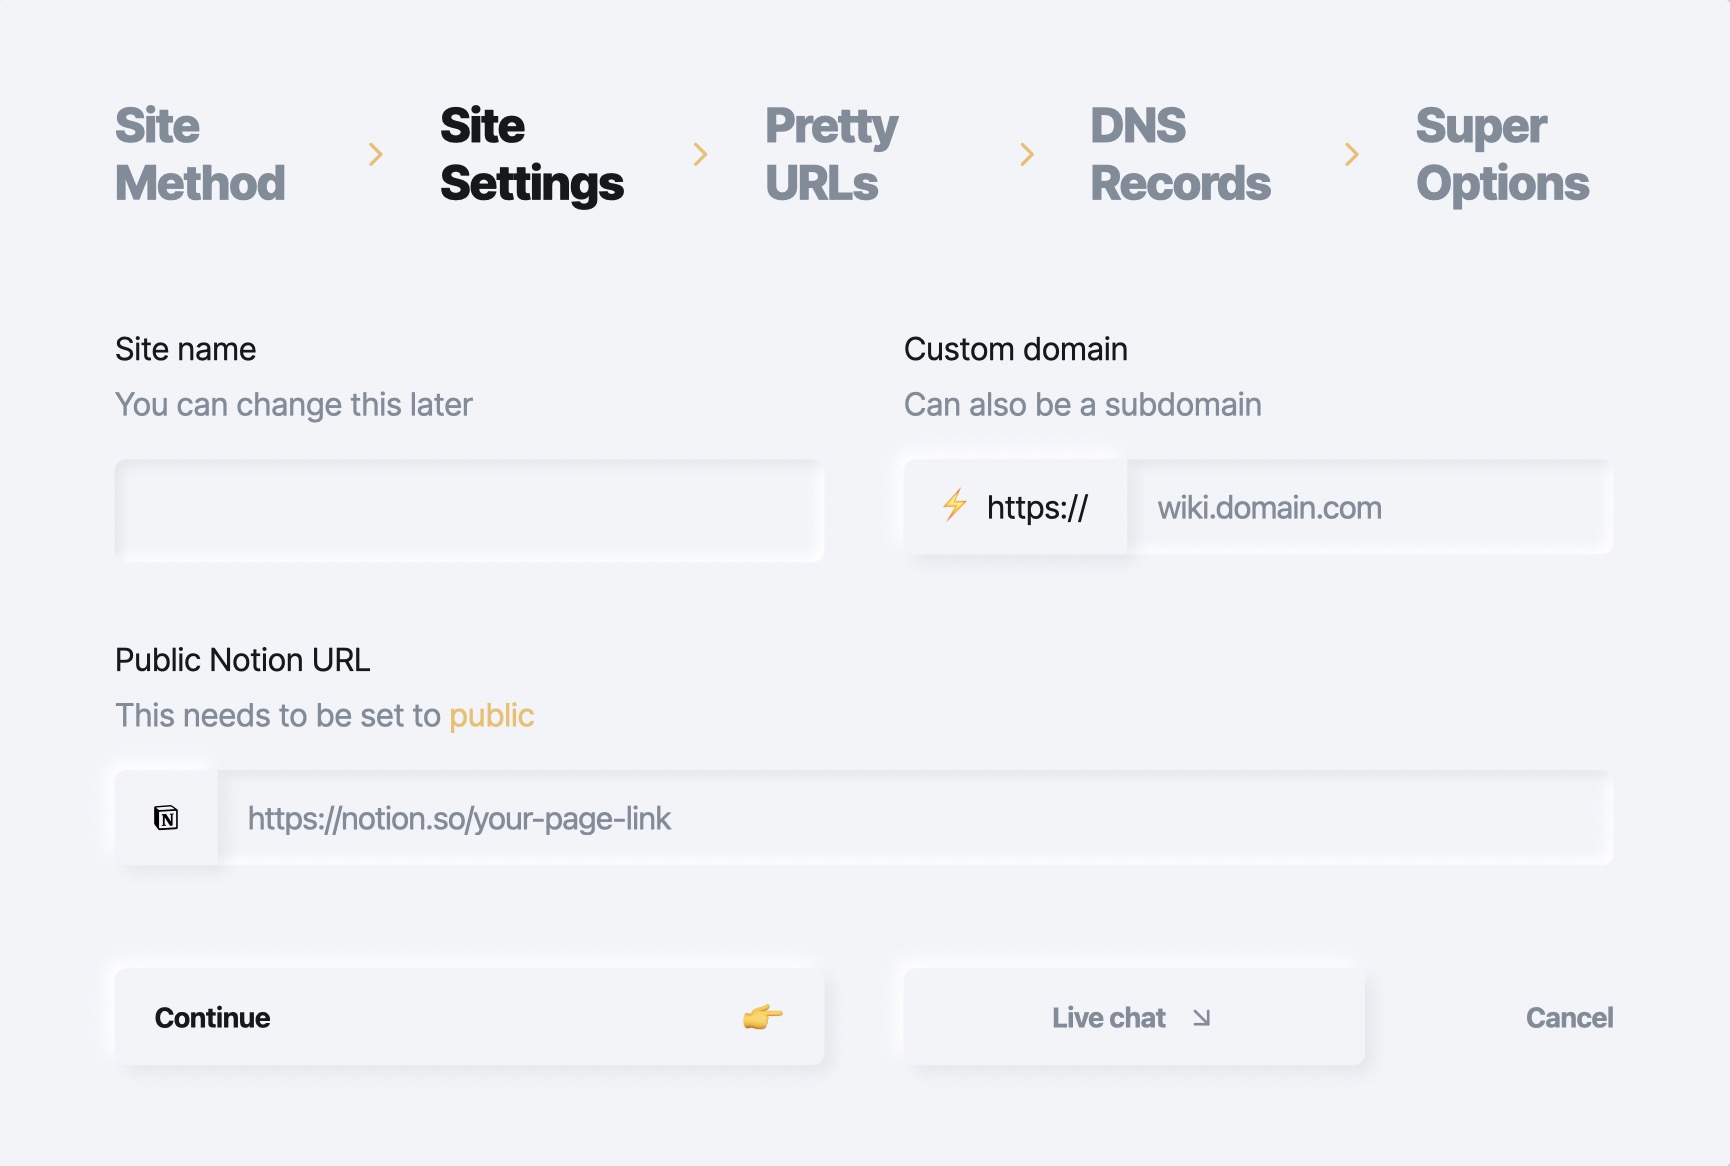
左の Site Name にサイトの名前を入力してください。Site NameはSuper内で表示される名前なので、なんでもOKです。
右の Custom domain にドメイン名を設定してください。このサイトの場合はudapon.tokyoというドメインを使いました。
まだドメインを持っていない方は、 Xドメイン などでドメインを取得しましょう。
下の Public Notion URL にはNotionの公開URLを設定します。
Notionの公開URLを取得するには、Notionで公開したページに移動して、右上のShareボタンをクリックします。
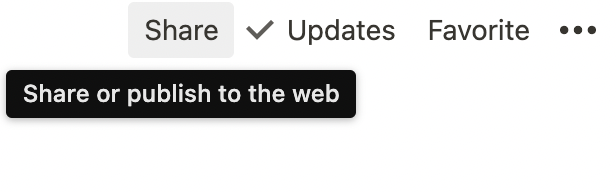
Share to Web をクリックするとURLが表示されます。

このURLがNotionの公開URLです。

Copy link をクリックして、URLをコピーし、先ほどの Public Notion URL に貼り付けましょう。
また、そのページの配下にあるコンテンツも全て公開されます。 一般に公開してはいけないメモなどが混じっていないか、確認しておきましょう。
Continue をクリックして先に進みます。
Pretty URLs
Pretty URLs
は、Superで自動的に生成された長いURLを、短くて覚えやすいURLに固定させるために使います。
よくわからない方は飛ばしてもOKです。
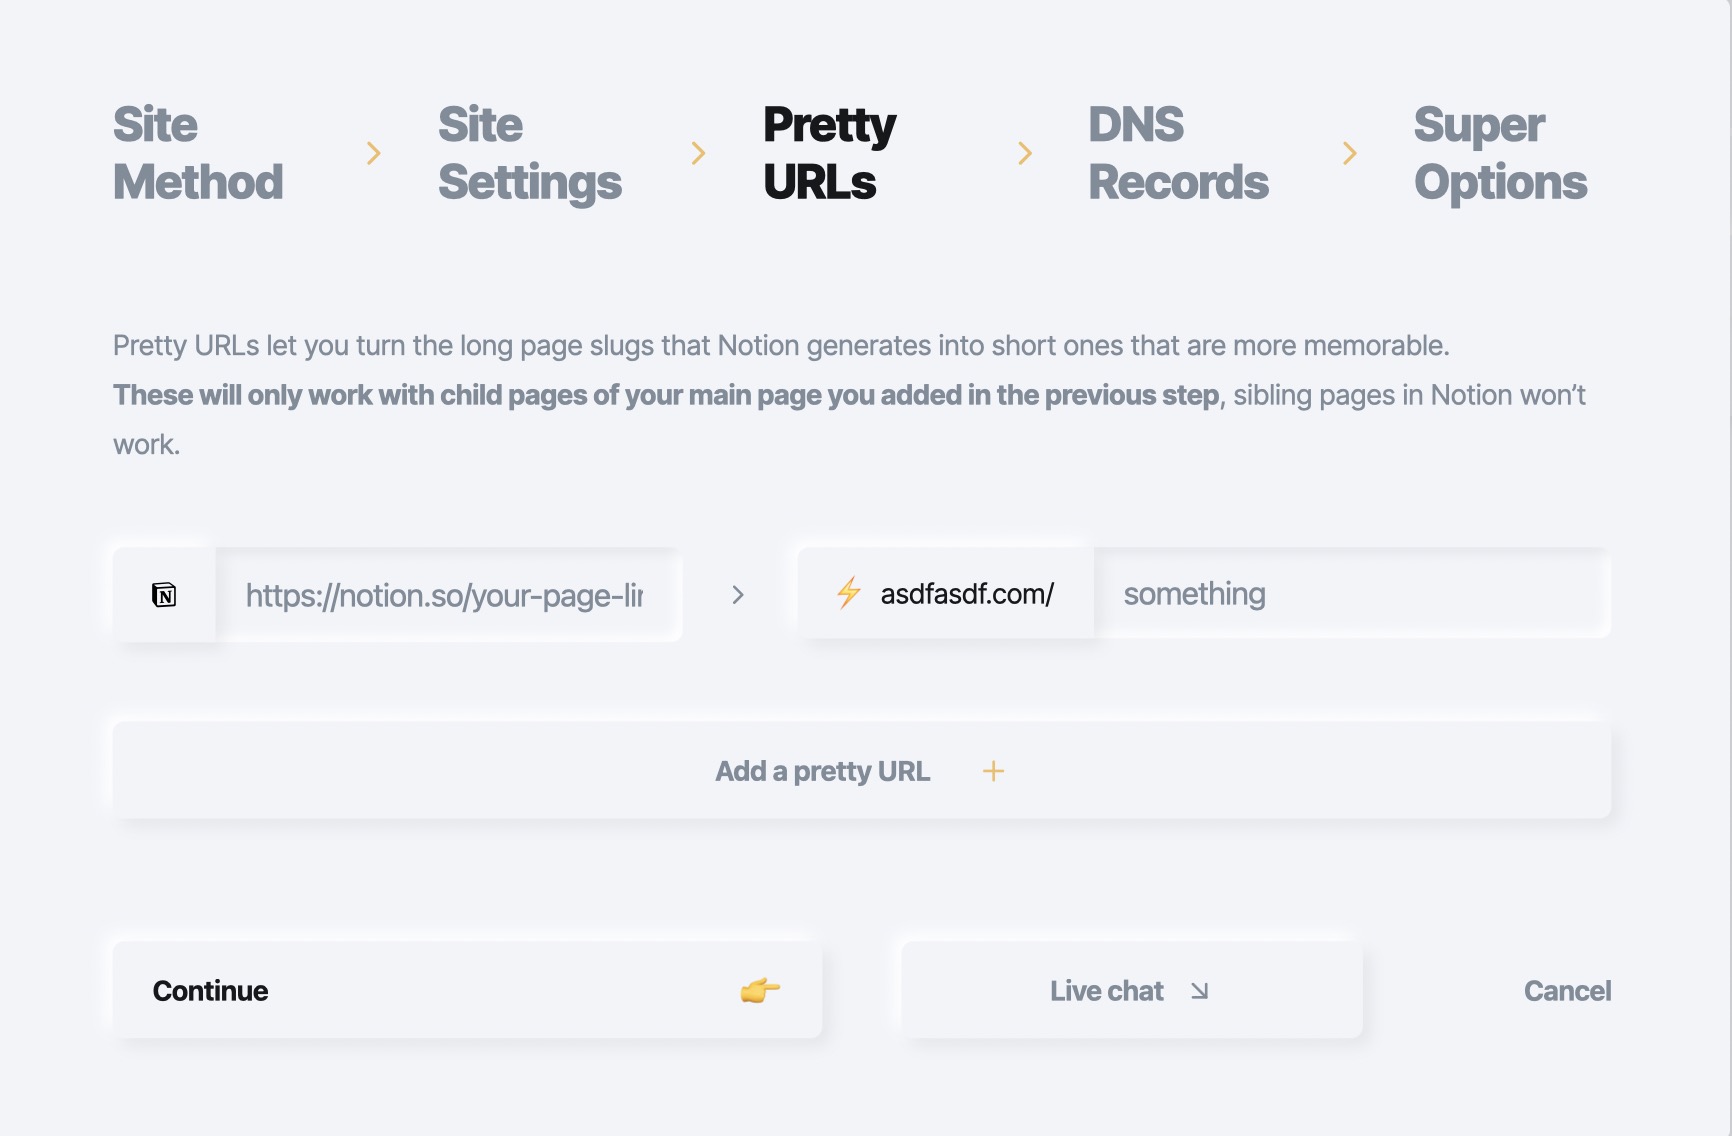
例えば、ブログ一覧ページのURLが "https://example.com/0974636199" のように、長くてわかりづらいURLだったとします。これではURLがわかりづらいので、 "https://example.com/blog" に変更したいですよね。
そんな時に、この画面でURLの固定化ができます。
DNS Records
次に、 DNS Records の設定をしましょう。
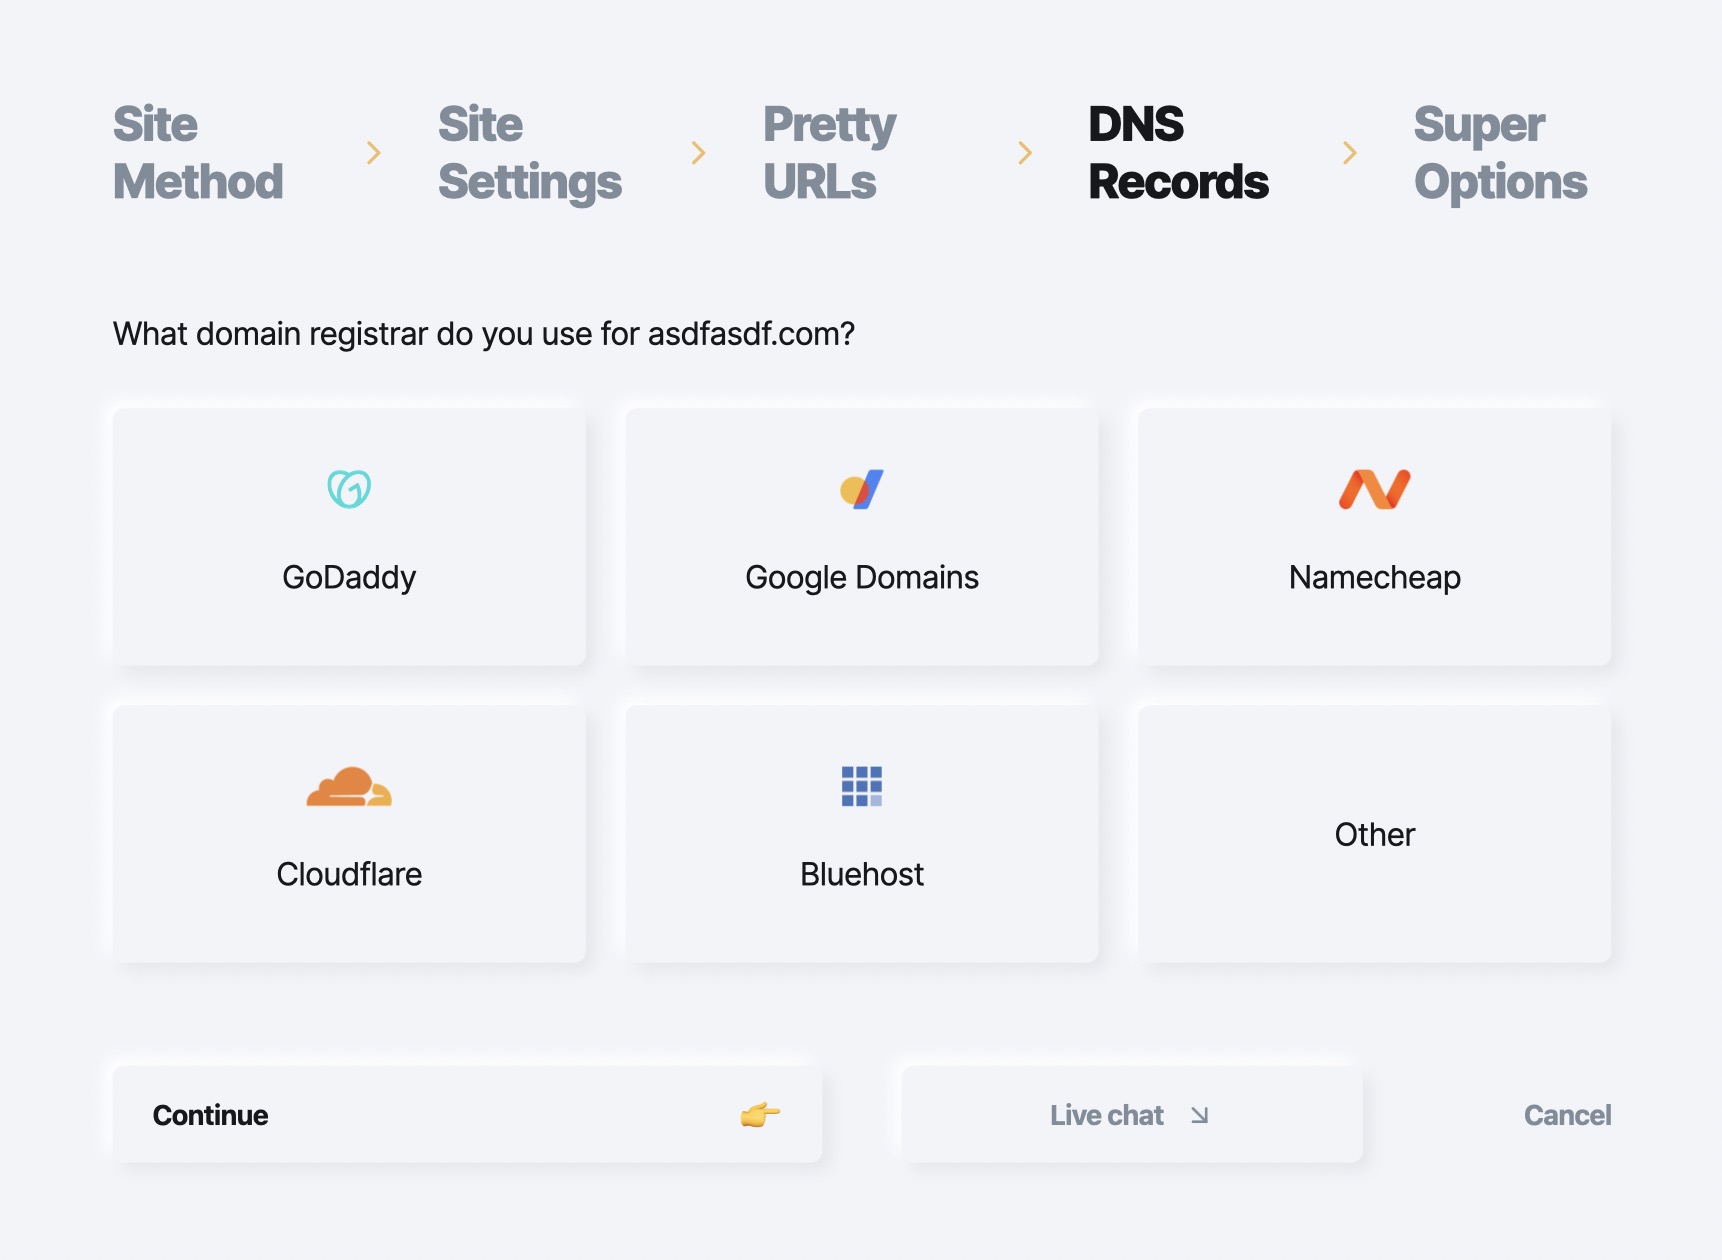
一般的なドメインサービスはここに無いため、 Other を選びます。
ここに表示された二つのDNSレコードを、使用しているドメインサービスの管理画面で入力します。
Xドメインで取得された方は、 こちら を参考にしてください。
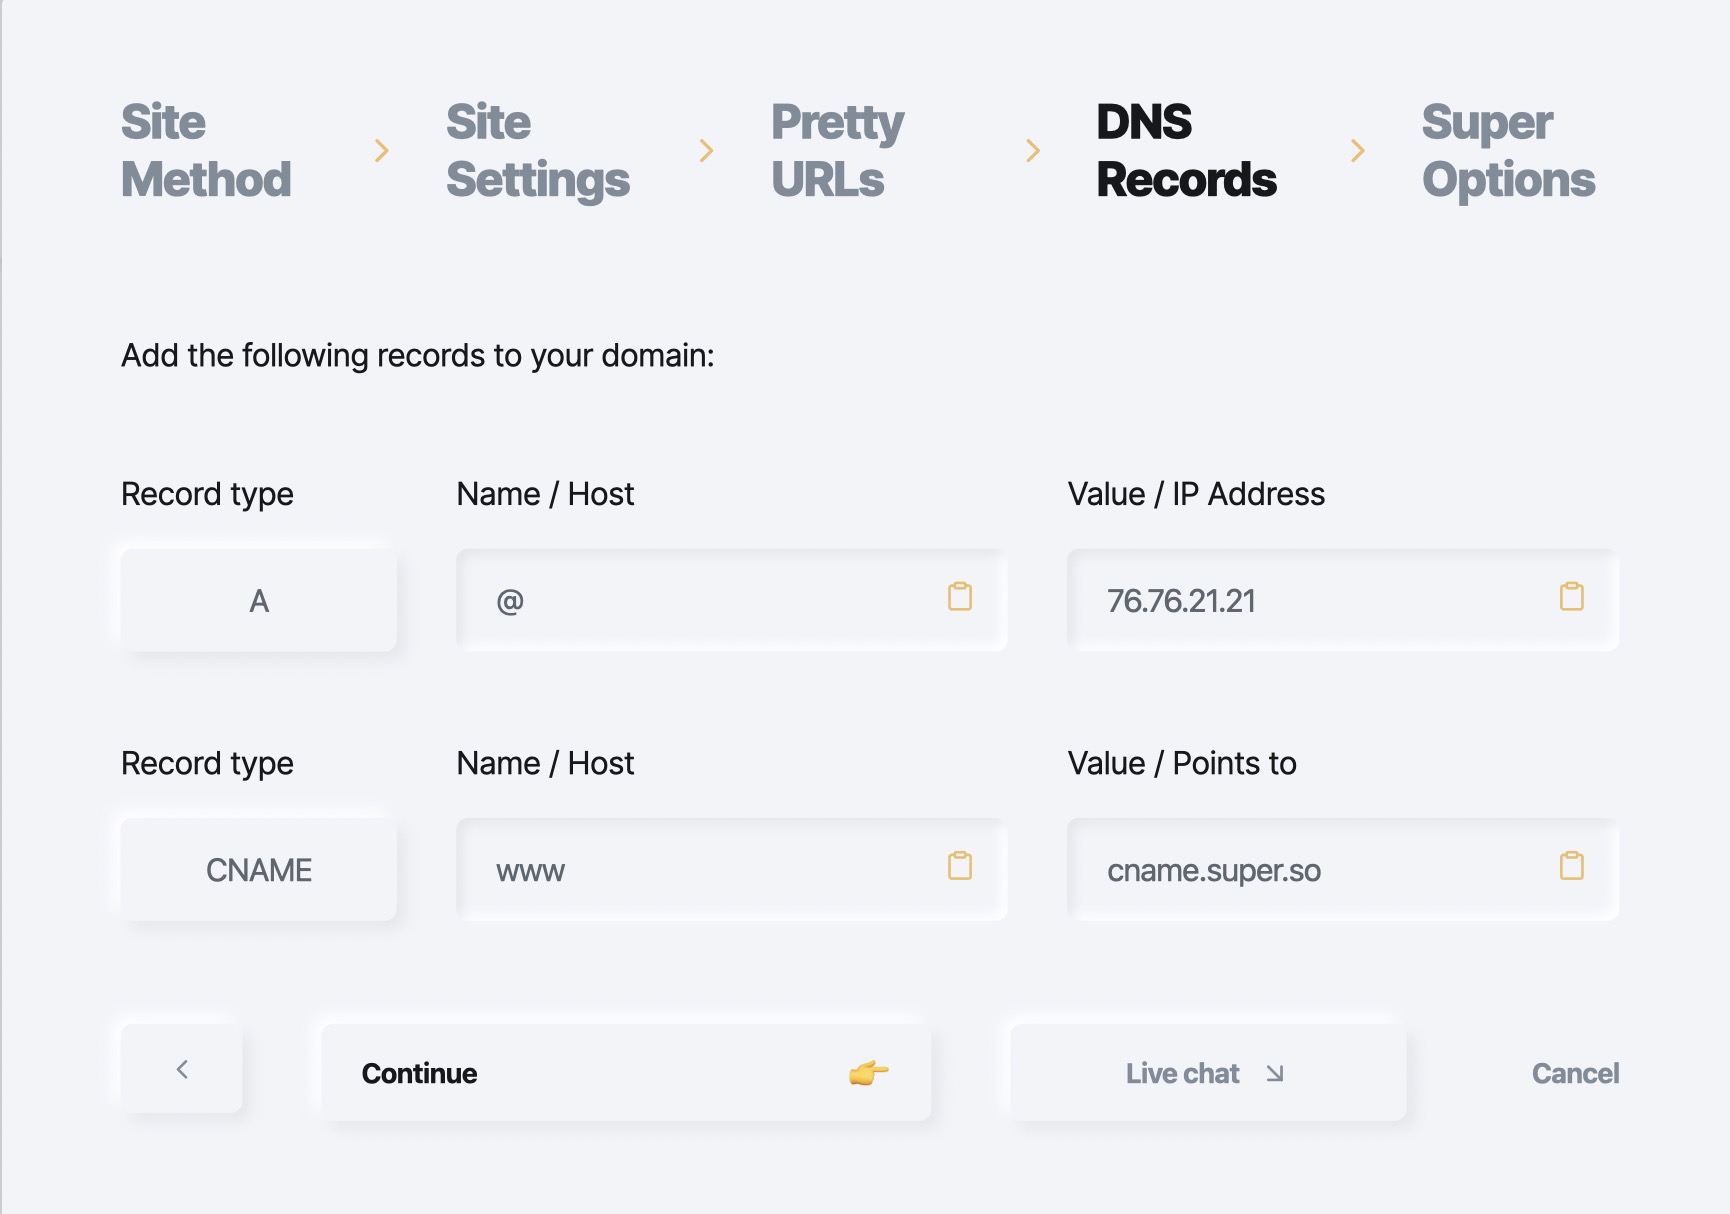
DNSレコードの反映には数時間から数日かかるので、反映されるまでしばらく待ちましょう。
Super Options
最後に Super Opitons で細かい設定を行いましょう。
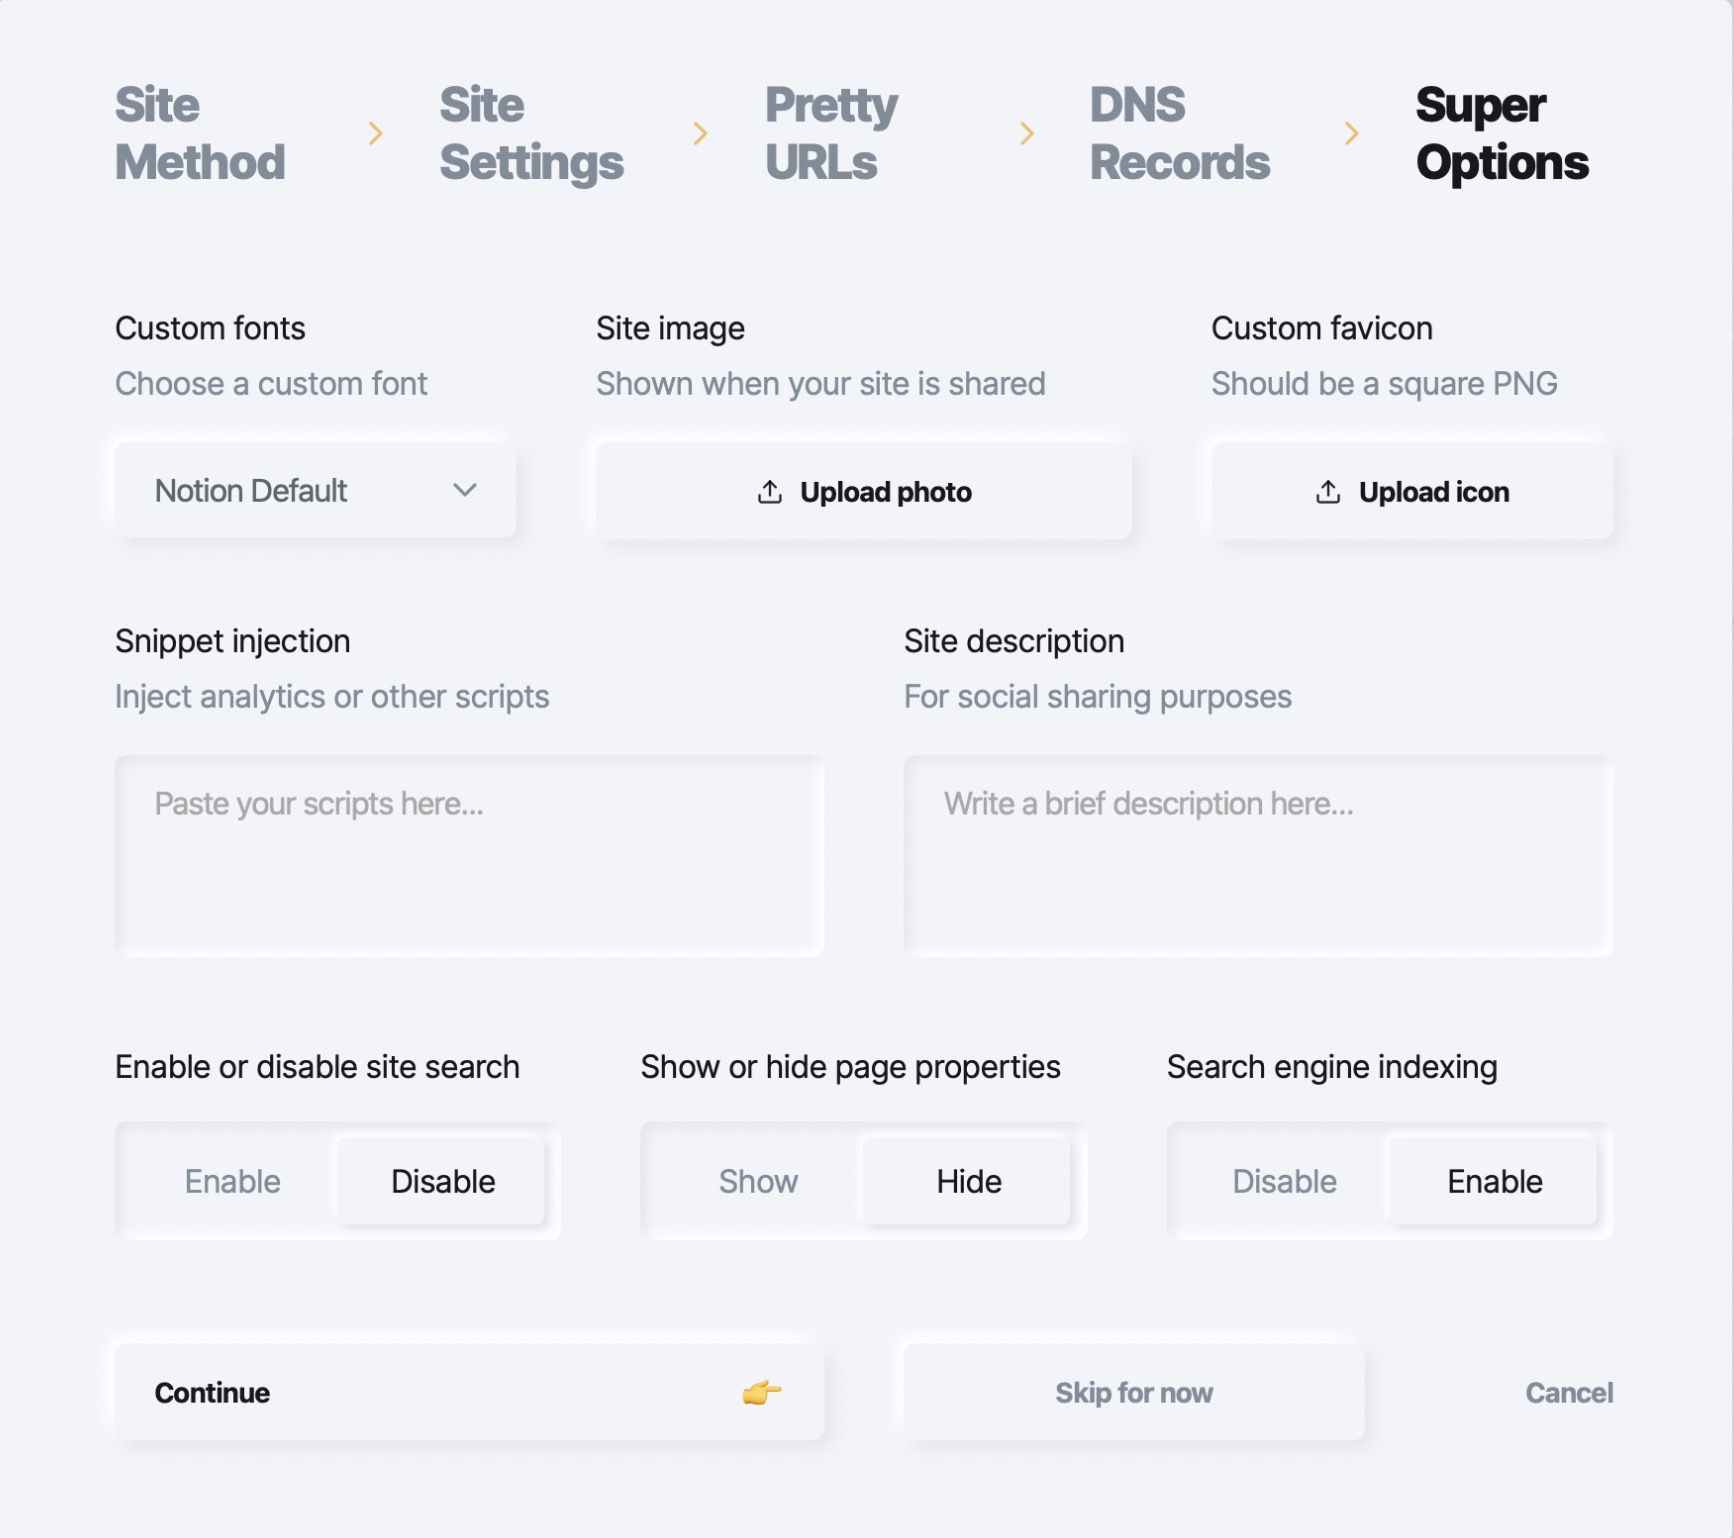
Custom fonts では、フォントを選べます。個人的にはNoto Sansが好きなので、日本語対応版のNoto Sans JPを選択しました。おすすめです。
Site image では、TwitterやFacebookなどSNSで共有する際に表示されるOGP画像の設定ができます。
Custom favicon では、faviconが設定できます。faviconとは、ブラウザのタブに表示されるアイコンのことです。例えば、Superのファビコンは雷のマークですね。
Snippet injection では、サイト全体のヘッダーにスニペットを埋め込むことができます。ここにGoogle アナリティクス等のJavaScriptタグや、カスタムCSSを埋め込められます。これが非常に便利なので、後ほど詳細を解説します。
Site description では、OGP画像と一緒に表示される説明文が指定できます。
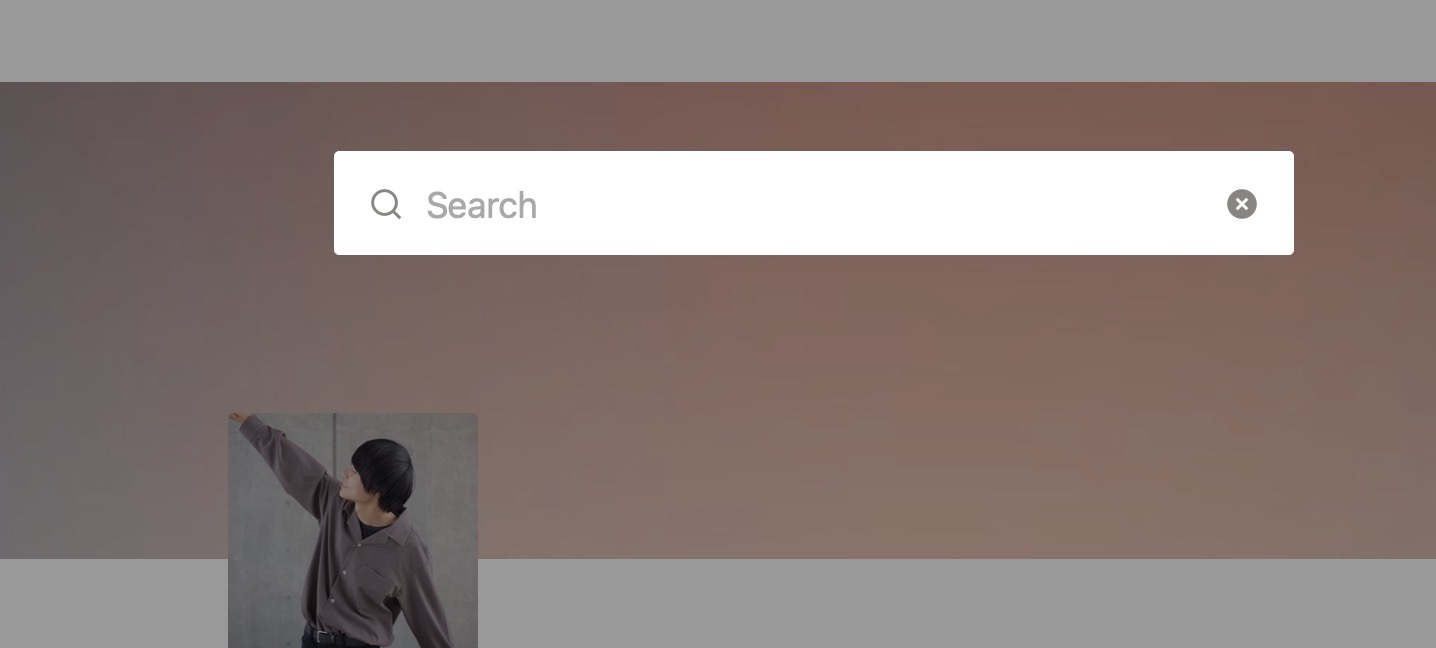
Enable or disable site search は、Enable(オン)にすると、サイトのヘッダーの右上部分にサイト内検索のボタンが表示されます。
Show or hide page properties は、Show(表示)にすると、個別ページでプロパティが表示されます。いらない方は、Hide(非表示)にしておきましょう。

Search engine indexing は、Googleなどの検索エンジンにインデックスさせるかどうかを選べます。わざわざSuperを使うということは、一般に公開させたいはずなので、 Enable (インデックスさせる)を選びましょう。
しばらく待つと、NotionがWebサイト化されます
DNSレコードの変更が反映されるまでに最大で数日かかるので、放置しましょう。
公開できました
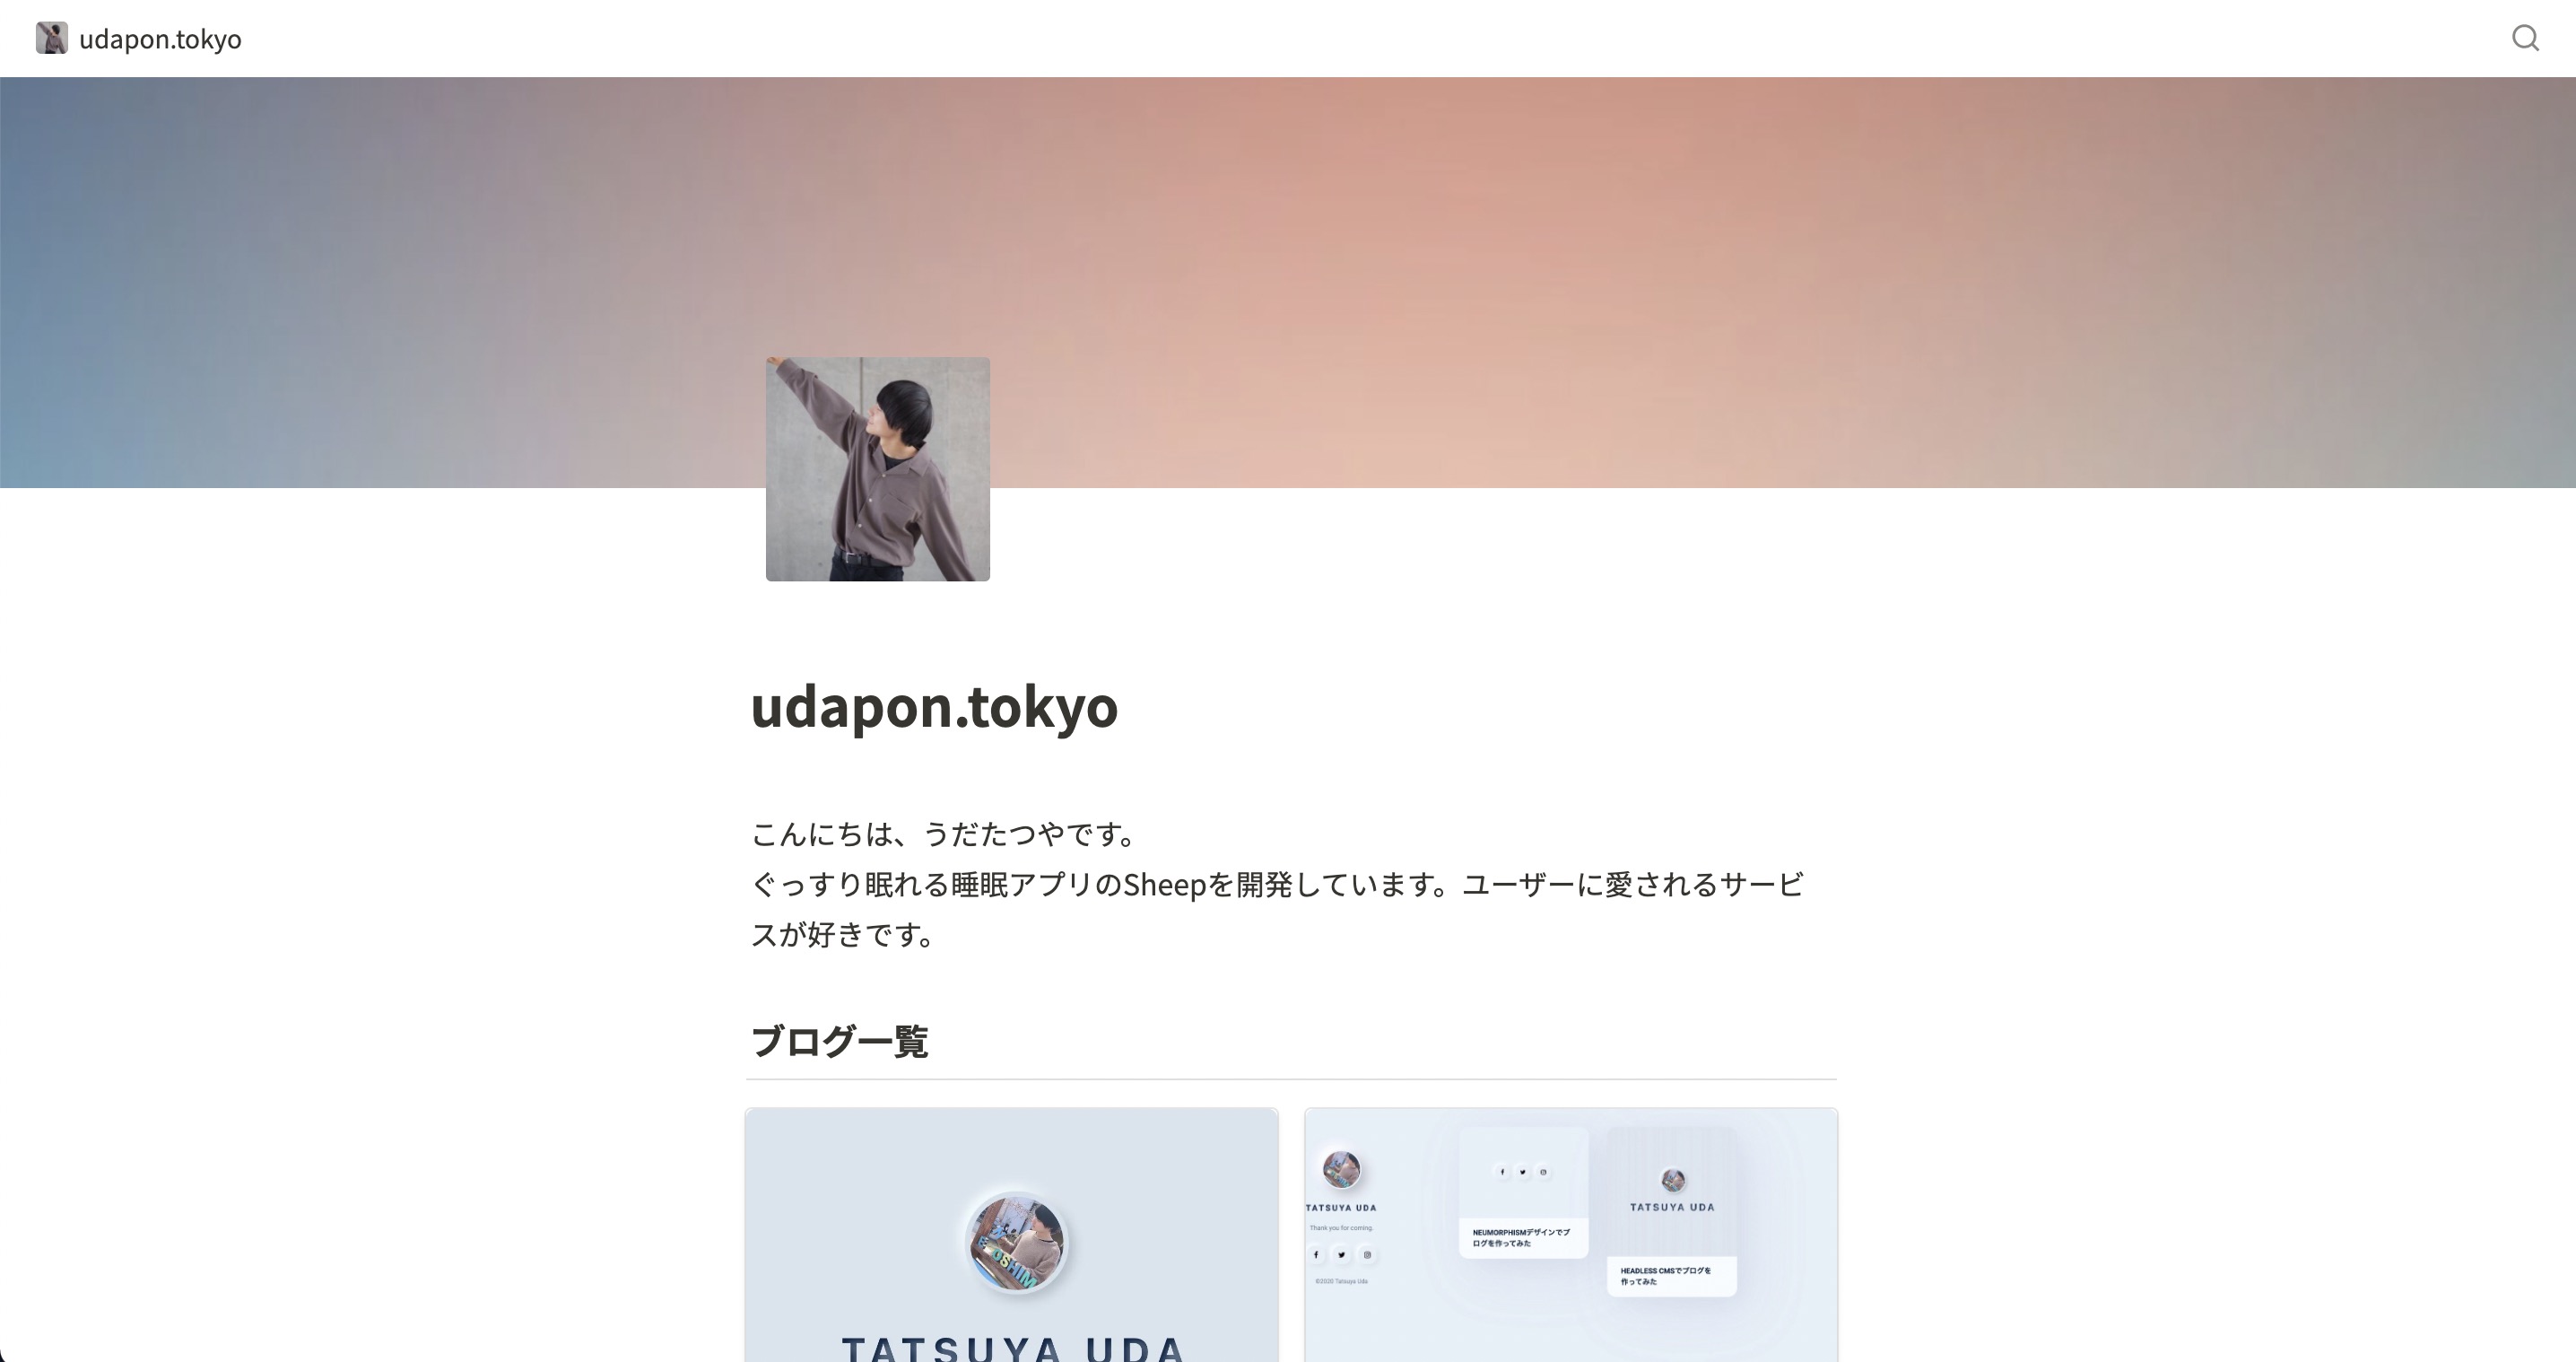
正常に公開できましたね。
サイトの見た目は、Notionの編集画面とそっくりです
Notionでブログを書いてみましょう
早速、ページを追加してSuperが正常に動作しているか試してみましょう!
Notion上でページを編集すると、数分後に公開サイトでも変更が反映されます。
中級編:Superを使ったNotionブログでできること
NotionをWordPressの代わりに使うのは、ほとんどの点でメリットばかりですが、 WordPressほどの拡張性はないため、困るポイントが少しあります。
例えば、Notionにはフッターがありません。毎回Notionのページの最後にフッターの内容を書くこともできますが、可能であればサイト全体で共通のフッターを設置したいですよね。(Superではもうじき、グローバルフッター機能が追加されるようです)
でも、やり方を工夫すれば、フッターのようなものを用意することは可能 です。(後述)
下書き / 公開管理機能
執筆途中の記事は下書きにしておきたいですよね。
データベースのフィルター機能を使えば、記事を下書きとして非公開にしておけます。
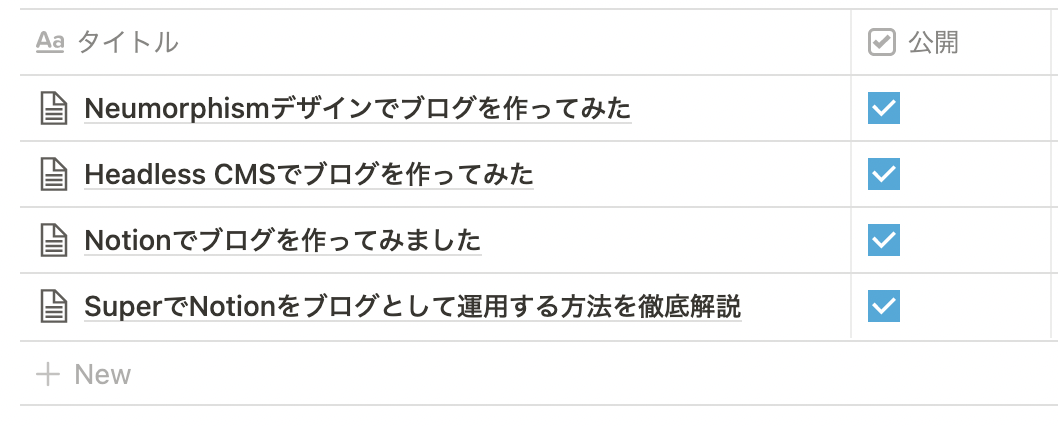
実際に、下書き機能を作るためのステップは以下の通りです。
1. データベースのプロパティに「公開」という名前のチェックボックスを追加
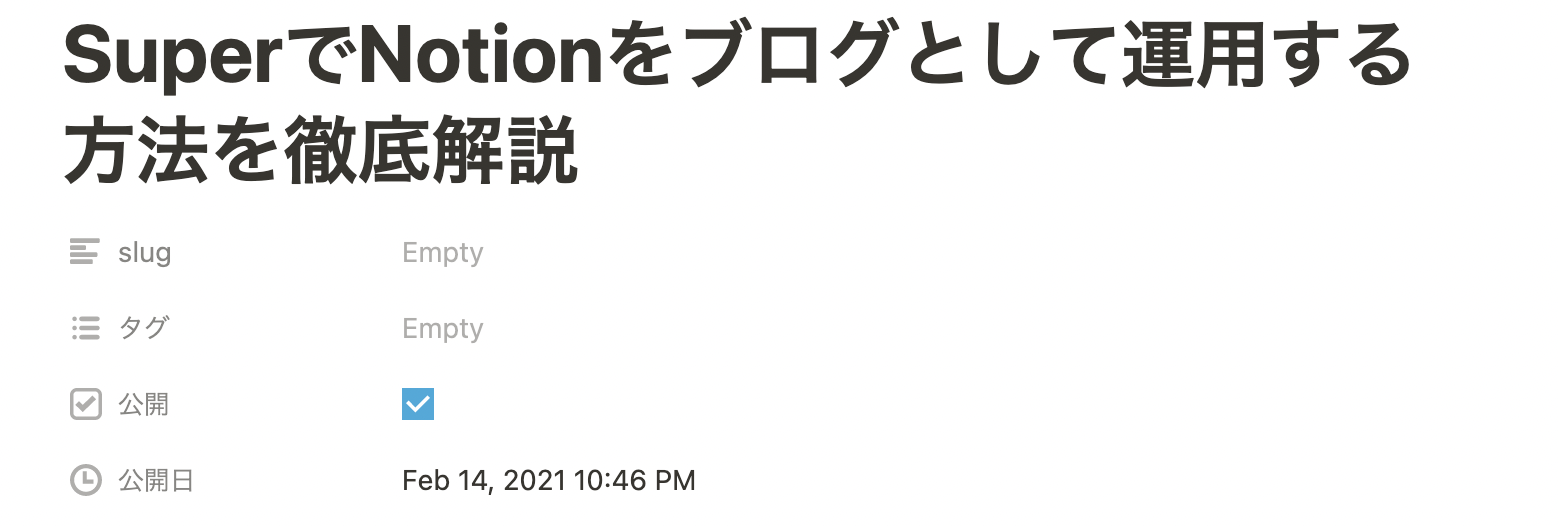
2.新しくビューを追加して、1番上に並び替える(ギャラリービューがおすすめ)

3.フィルター機能で、公開チェックボックスがチェックされているものだけ表示させる
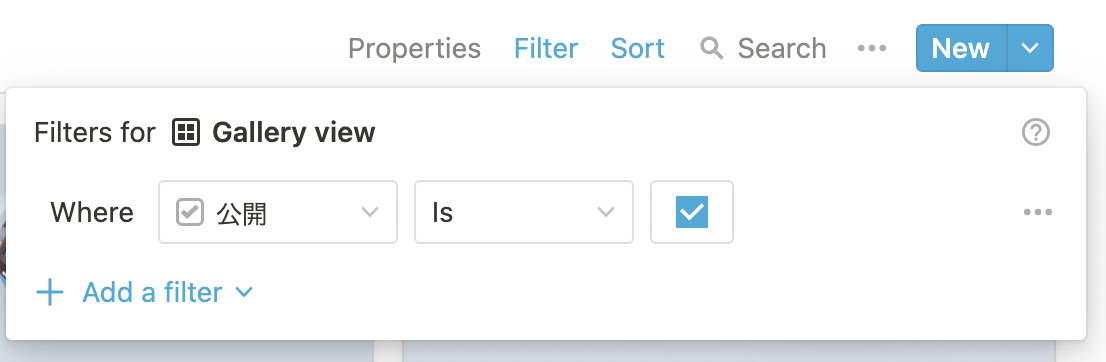
こうすれば、公開のチェックボックスにチェックが入ったページだけサイトで表示させることが可能です。
Googleアナリティクスでアクセス分析
どのページがどれだけアクセスがあるのか、調べられたら嬉しいですよね。
Superならヘッダーに任意のコードを挿入できるため、Googleアナリティクスのタグを埋め込められます。
Snippet injectionの部分に、以下のようなGoogleアナリティクスのタグをそのまま貼り付ければOKです。
<!-- Global site tag (gtag.js) - Google Analytics -->
<script async src="https://www.googletagmanager.com/gtag/js?id=YOUR_ID"></script>

<script>
  window.dataLayer = window.dataLayer || [];
  function gtag(){dataLayer.push(arguments);}
  gtag('js', new Date());

  gtag('config', 'YOUR_ID');
</script>
しっかりとデータが取得できています。
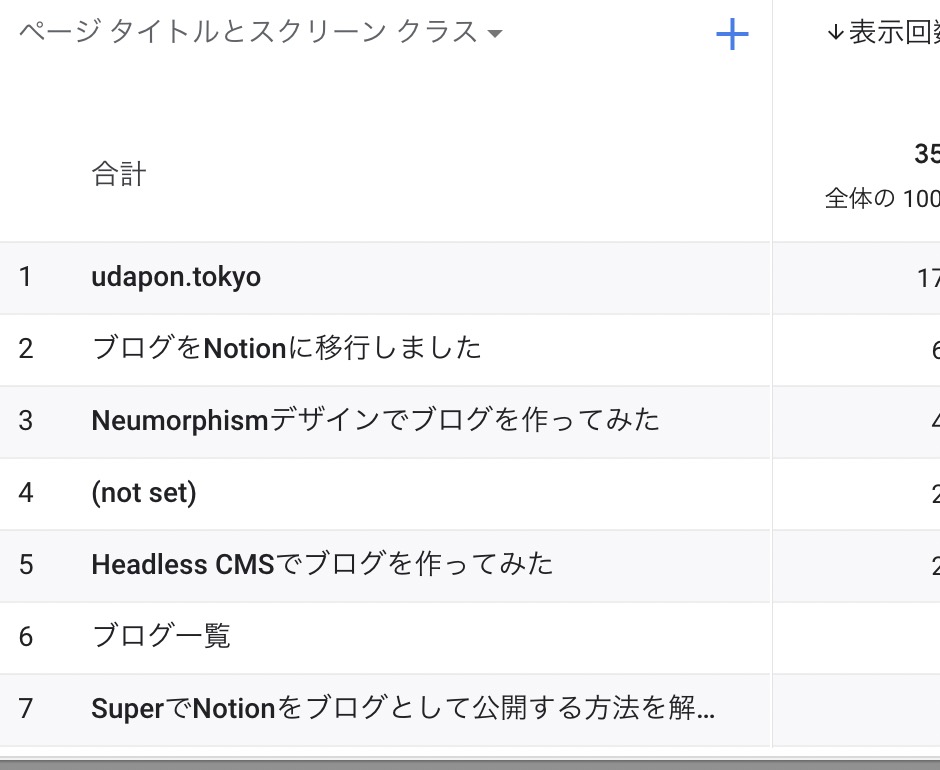
Googleタグマネージャーが導入できるので、細かいイベント収集や、スクロール率計測、A/Bテストなどもできますね🙂
同様にして、Googleアドセンスなどの広告も埋め込めると思います。(未検証)
上級編:カスタムCSSでNotionブログをカスタマイズする
ここからは、さらにNotionをカスタマイズしたい方に向けて、 実際に僕が作成したカスタムCSSを紹介します。
ここに掲載しているCSSをそのままSnippet injectionに貼り付けて保存すれば使えます。(反映までしばらく時間がかるので注意してください!)
実際に僕が適用しているカスタムCSSを公開
実際に使っているカスタムCSSを全て公開します! デザイナー兼エンジニアの腕を活かして、Notionを最高に見やすくするCSSを書いてみました。
僕が実際に使用しているCSS(クリックで表示)
<style>
	/* 画像周りの余白調整 */
	.notion-image {
  	 margin-top: 14px !important;
 	   margin-bottom: 30px !important;
	}

	/* 文字の余白、行の高さ調整 */
	.notion-text__content {
			line-height: 2;
			margin-top: 24px !important;
			margin-bottom: 24px !important;
	}

	/* 見出しの余白調整 */
	h2 {
	    margin-top: 60px !important;
	    margin-bottom: 20px !important;
	}

	h3 {
	    margin-top: 50px !important;
	    margin-bottom: 20px !important;
	}

	/* 見出し2に下線を追加 */
	h2.notion-heading {
	    padding-bottom: 12px;
	    border-bottom: 2px solid rgb(237 237 236);
	}

	/* タイトルの大きさを調整 */
	.notion-header__title {
	    line-height: 1.5 !important;
	    font-size: 30px !important;
	}

	/* プロフィールカード(Callout + ブラウンカラーの場合のみ)*/
	.notion-callout.bg-brown-light .notion-callout__content .notion-semantic-string span:nth-child(1) {
	    margin-bottom: 4px !important;
	    display: block !important;
	}

	.notion-callout.bg-brown-light .notion-callout__content .notion-semantic-string span:not(:nth-child(1)) {
	    display: inline;
	    font-size: 12px;
	}

	.notion-callout.bg-brown-light .notion-callout__icon div {
	    width: 80px !important;
	    height: 80px !important;
	    border-radius: 60px;
	}

	.notion-callout.bg-brown-light .notion-callout__icon {
	    margin-right: 6px;
	    width: fit-content !important;
	    min-width: fit-content !important;
	}

	.notion-callout.bg-brown-light {
	    border-radius: 8px !important;
	    border: none !important;
	    padding: 22px !important;
	}

	/* ページの横幅を小さく固定 */
	.notion-header__content.max-width {
	    max-width: 800px  !important;
	}
	.super-content.max-width {
	    max-width: 800px  !important;
	}

	/* ブログ一覧のアイコンを非表示 */
	.notion-property__title__icon-wrapper {
	    display: none !important;
	}

	/* ブログ一覧のシャドウを調整 */
	.notion-collection-card {
	    box-shadow: 0 1px 19px 2px #0000000f !important;
	    border-radius: 8px !important;
	}

	/* ブログ一覧のページタイトルのデザインをみやすく変更 */
	.notion-property.notion-property__title {
	    padding: 14px 14px !important;
	    font-size: 14px !important;
	}
	.notion-collection-card.gallery .notion-property__title .notion-semantic-string {
	    white-space: normal !important;
	}

	/* カバー画像がない場合のページの上の間延び部分を小さく変更 */
	.notion-header__cover.no-cover {
	    height: 40px !important;
	}


	/* 吹き出し用CSS */
	.notion-callout.bg-green-light {
	    background: white !important;
	    border: none !important;
	    padding: 0px !important;
	}

	.notion-callout.bg-green-light .notion-callout__icon {
	    min-width: 46px !important;
	}

	.notion-callout.bg-green-light .notion-callout__icon img {
	    width: 100% !important;
	    padding: 0px !important;
	    height: 100% !important;
	}

	.notion-callout.bg-green-light .notion-callout__icon > * {
	    width: 40px !important;
	    height: 40px !important;
	    border-radius: 50px;
	    display: block;
	    overflow: hidden;
	    margin: 0px !important;
	    padding: 0px !important;
	}

	.notion-callout.bg-green-light .notion-callout__content {
	    margin: 0px;
	    border: 1px solid #ddd;
	    padding: 20px;
	    border-radius: 6px;
	    margin-left: 10px;
	    position: relative;
	}
	.notion-callout.bg-green-light .notion-callout__content:after {
	    content: "";
	    display: inline-block;
	    position: absolute;
	    top: 11px;
	    left: -16px;
	    border: 8px solid transparent;
	    border-right: 8px solid #ffffff;
	}
	.notion-callout.bg-green-light .notion-callout__content:before {
	    content: "";
	    display: inline-block;
	    position: absolute;
	    top: 10px;
	    left: -19px;
	    border: 9px solid transparent;
	    border-right: 9px solid #dddddd;
	}

	/* 〇〇の部分を変えると、表示名が替わります。 */
	.notion-callout.bg-green-light .notion-callout__icon:after {
	    content: "〇〇";
	    font-size: 10px;
	    line-height: 1 !important;
	    display: block;
	    position: absolute;
	}


</style>
Anotion用CSS(クリックで表示)
/*フォント*/

.lang-ja {
    font-family: Noto Sans JP, "Helvetica","Apple Color Emoji","Segoe UI Emoji",NotoColorEmoji, "Noto Color Emoji","Segoe UI Symbol","Android Emoji",EmojiSymbols, -apple-system,"BlinkMacSystemFont","Segoe UI","Roboto", "Helvetica Neue","Noto Sans",sans-serif;
}
/*画像*/
.notion-asset-wrapper-image {
    margin-top: 14px !important;
    margin-bottom: 30px !important;
}

/*テキスト*/
.notion-text {
    line-height: 2;
    margin-top: 20px !important;
    margin-bottom: 20px !important;
}

/*タイトル*/
.title {
    line-height: 1.5 !important;
    font-size: 30px !important;
}

/*見出し*/
h2 {
    margin-top: 60px !important;
    margin-bottom: 6px !important;
    padding-bottom: 12px !important;
    border-bottom: 2px solid rgb(237 237 236) !important;
}

h3 {
    margin-top: 50px !important;
    margin-bottom: 6px !important;
}

h3.notion-collection__header {
    margin-top: 40px !important;
}


/*フッター*/

.notion-callout.notion-brown_background_co .notion-callout-text .notion-link:nth-child(1) {
    margin-bottom: 4px !important;
    display: block !important;
    width: max-content;
    font-size: 14px;
}
.notion-callout.notion-brown_background_co .notion-callout-text {
    display: inline;
    font-size: 12px;
}

.notion-callout.notion-brown_background_co .notion-page-icon {
    width: 80px !important;
    height: 80px !important;
    max-width: 80px !important;
    max-height: 80px !important;
    border-radius: 60px;
    margin-right: 6px;
}

.notion-callout.notion-brown_background_co {
    border-radius: 8px !important;
    border: none !important;
    padding: 22px !important;
}

/*横幅*/
.container {
    max-width: 620px  !important;
}

/*カード*/
.notion-gallery-grid .notion-page-title-icon {
    display: none !important;
}
.notion-collection-card {
    box-shadow: 0 1px 19px 2px #0000000f !important;
    border-radius: 8px !important;
}
.notion-collection-card-body {
    padding: 14px 14px !important;
    font-size: 14px !important;
}
.notion-collection-card-property {
    line-height: 1 !important;
    padding: 0px !important;
}
.notion-collection-card-property .notion-page-title-text {
    white-space: normal !important;
    font-weight: 500;
    line-height: 1.5;
}
.notion-collection-card-cover {
    border: none;
}

/*ヘッダーカバー*/
.notion-header__cover.no-cover {
    height: 40px !important;
}

.notion-header__content.no-icon.has-cover .notion-header__title-wrapper{
    margin-top: 30px;
}


/*callout*/
.notion-callout {
    padding: 24px !important;
    margin-top: 22px !important;
    margin-bottom: 26px !important;
}
.notion-callout__content {
    font-size: 14px !important;
    line-height: 1.75 !important;
}
.notion-callout-text {
    font-size: 14px;
    line-height: 1.75 !important;
}


/*code*/
.notion-code  {
    padding: 28px !important;
    margin-top: 18px !important;
    margin-bottom: 18px !important;
    font-size: 12px !important;
    line-height: 1.4 !important;
    text-shadow: none !important;
}


/*一覧*/
.notion-collection-card__content {
    padding: 0px 14px 14px !important;
    color: #777 !important;
    margin-top: -10px !important;
}
.notion-list-item {
    font-size: 14px !important;
    line-height: 2 !important;
}


/*関連記事リスト*/
.contents div:last-of-type .notion-collection-header {
    display: none  !important;
}
.contents div:last-of-type .notion-gallery .notion-gallery-grid-size-small {
    border-top: none !important;
}


/*スマホ*/
@media only screen and (max-width: 479px){
    /*タイトル*/
    .title {
        font-size: 24px !important;
    }

    /*見出し*/
    h2, h3 {
        font-size: 20px !important;
    }

    /*ギャラリーカード*/
    .notion-gallery-grid-size-small {
        grid-template-columns: repeat(auto-fill,minmax(128px,1fr)) !important;
    }
    .notion-gallery-grid-size-small .notion-page-title-text {
        font-size: 12px !important;
    }
    .notion-gallery-grid-size-small .notion-collection-card-cover,
    .notion-gallery-grid-size-small .notion-collection-card-cover img {
        height: 96px !important;
        max-height: 96px !important;
    }
}


/*テーブル*/
.notion-table-of-contents {
    margin-top: 30px !important;
    margin-bottom: 20px !important;
}


/*ヘッダーカバー*/
.coverImage {
    max-width: 580px;
    height: auto !important;
}

.page-_top .coverImage {
    max-width: unset !important;
    height: 30vh !important;
}


/*トップページのみ*/
#page-index .notion-header {
    max-width: unset !important;
}


/*吹き出し*/

.notion-callout.notion-teal_background_co,
.notion-callout.notion-blue_background_co
{
    position: relative;
    width: calc(100% - 60px);
    margin-left: 60px;
    border: none;
    border-radius: 10px;
    background-color: #fff;
    border: 1px solid #ddd;
    box-sizing: border-box;
    font-size: 14px;
    padding: 20px !important;
}
.notion-callout.notion-teal_background_co .notion-page-icon,
.notion-callout.notion-blue_background_co .notion-page-icon,
{
    top: 0px;
    left: -60px;
    max-width: 40px;
    position: absolute;
    width: 40px;
    max-height: 40px;
    height: 40px;
    border-radius: 100px !important;
}
.notion-callout.notion-teal_background_co:before,
.notion-callout.notion-blue_background_co:before
{
    content: "";
    position: absolute;
    top: 50px;
    display: inline-block;
    top: 10px;
    left: -19px;
    border: 9px solid transparent;
    border-right: 9px solid #dddddd;
}
.notion-callout.notion-teal_background_co:after,
.notion-callout.notion-blue_background_co:after{
    content: "";
    position: absolute;
    top: 11px;
    left: -16px;
    border: 8px solid transparent;
    border-right: 8px solid #ffffff;
}

.notion-callout.notion-teal_background_co div:after {
    content: "うだたつや";
    font-size: 10px;
    line-height: 1 !important;
    position: absolute;
    top: 48px;
    left: -62px;
}


.notion-callout.notion-blue_background_co div:after {
    content: "読者さん";
    font-size: 10px;
    line-height: 1 !important;
    position: absolute;
    top: 48px;
    left: -62px;
}


/*リンク*/
.notion-link {
    color: #007185 !important;
    border-bottom: 1px solid #007185 !important;
}


/*プロパティ非表示*/
.notion-collection-row {
    display: none;
}


/*目次*/
.notion-table-of-contents {
    background-color: #f8f7f7;
    padding: 20px;
    box-sizing: border-box;
    border-radius: 6px;
}

.notion-table-of-contents-item {
    border-bottom: 1px solid #e8e8e8;
    padding: 10px 2px !important;
}
.notion-table-of-contents-item-body {
    width: 100% !important;
    font-size: 12px !important;
    border: none !important;
}
以下で、詳細を解説します。
画像と文章の余白を修正
Noitonは全体的にみやすいデザインなのですが、一般に公開するページとして考えると、少し文章や画像との余白が狭く、窮屈な印象です。
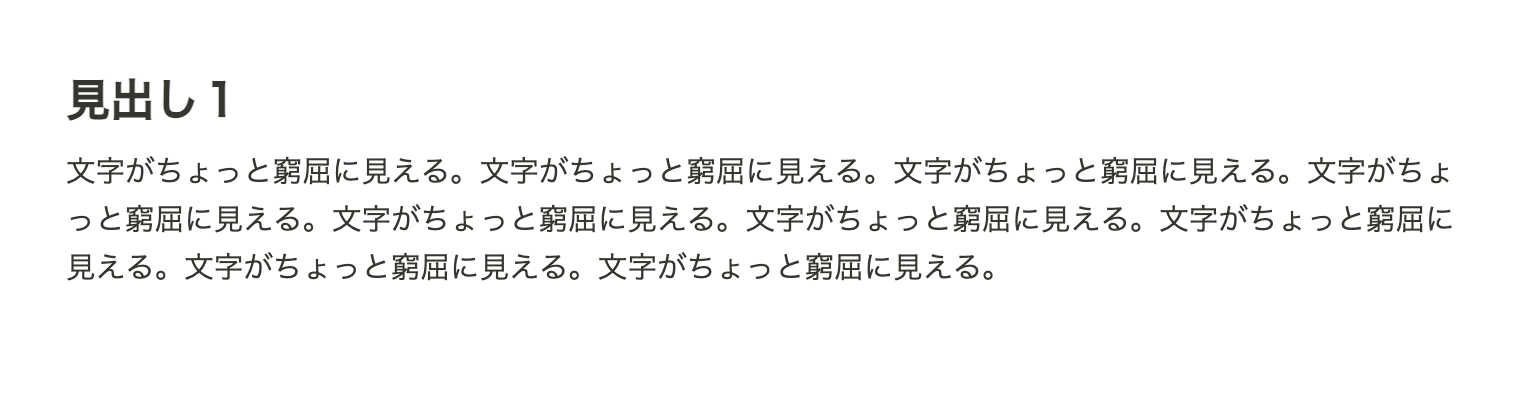
そこで、以下のCSSを追加します。
<style>
	/* 画像周りの余白調整 */
	.notion-image {
  	 margin-top: 14px !important;
 	   margin-bottom: 30px !important;
	}

	/* 文字の余白、行の高さ調整 */
	.notion-text__content {
			line-height: 2;
			margin-top: 24px !important;
			margin-bottom: 24px !important;
	}

	/* 見出しの余白調整 */
	h2 {
	    margin-top: 60px !important;
	    margin-bottom: 20px !important;
	}

	h3 {
	    margin-top: 50px !important;
	    margin-bottom: 20px !important;
	}
</style>
本の少しの差ですが、少し文字がみやすくなりました。
細かいこだわりですが、実際に文章を読んでみるとかなり違います。
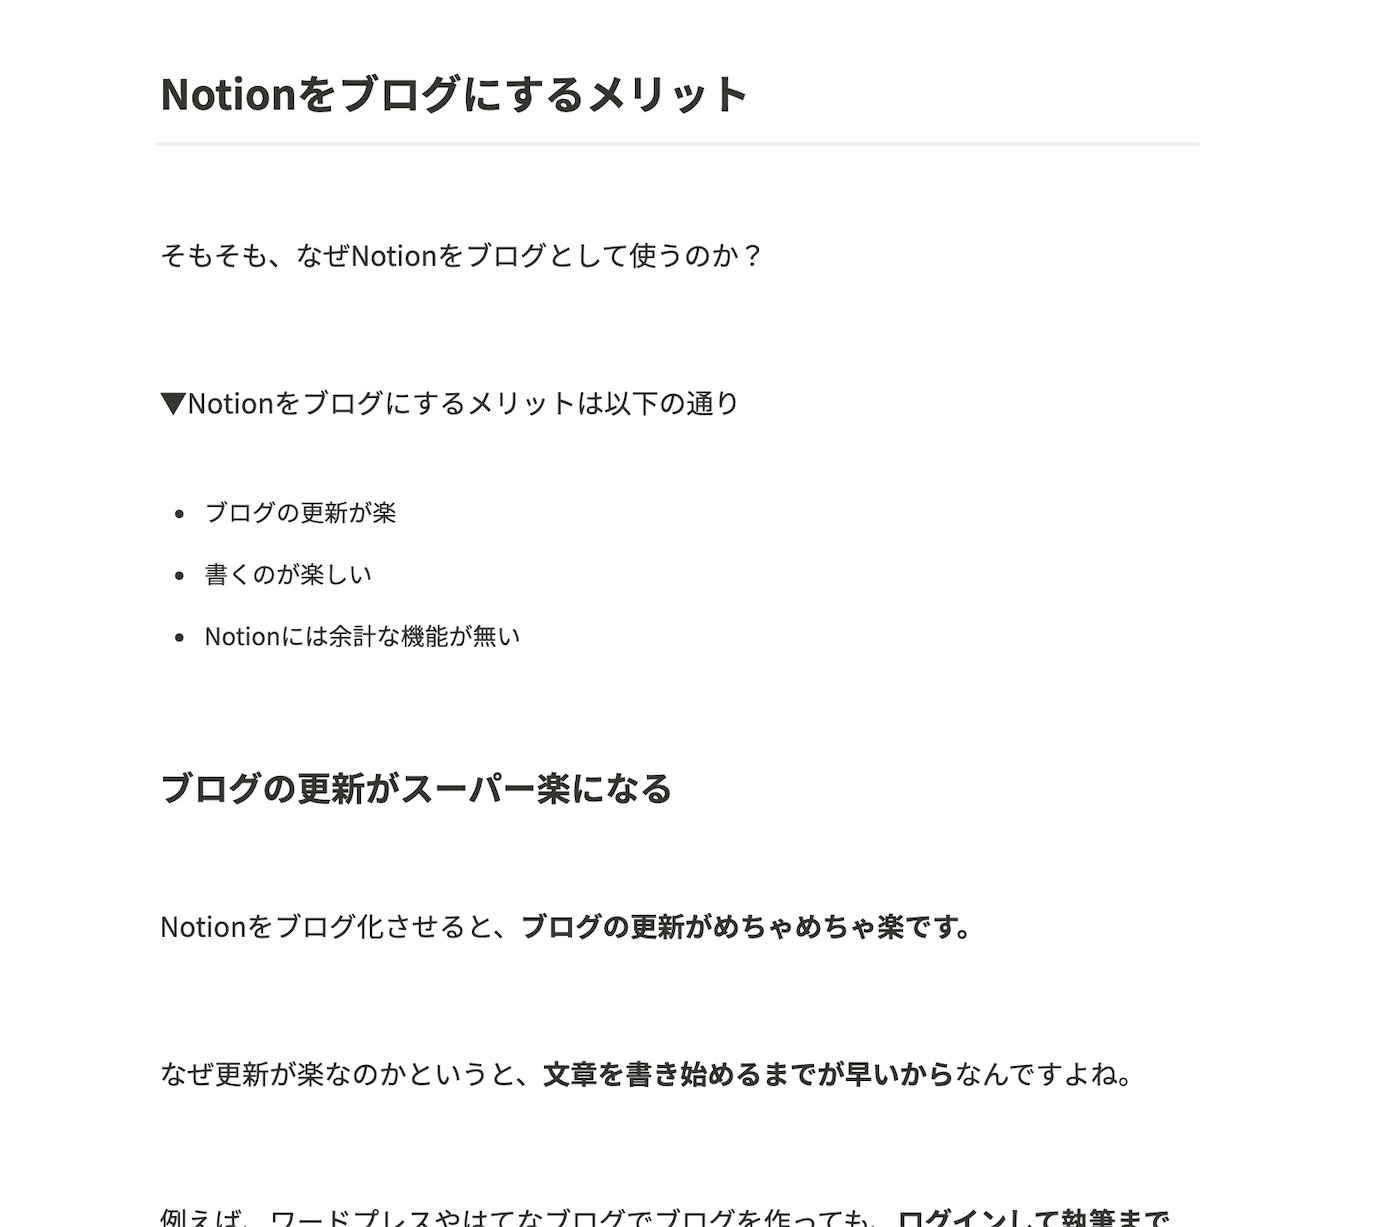
余白が増えて、だいぶ読みやすくなりましたね!
見出し2に下線をつけて強調する
Notionには、見出しが複数ありますが、それぞれを判別するにはフォントサイズの大きさで判断するしかありません。
個人的には、見出し2ごとに内容をブロック分けしたいので、デザインを変えたいです。 そこで、見出し2を装飾してみました。
以下のCSSを追加すると、 自動的にh2の下に下線が入るようになります。
<style>

	/* 見出し2に下線を追加 */
	h2.notion-heading {
	    padding-bottom: 12px;
	    border-bottom: 2px solid rgb(237 237 236);
	}

</style>
プロフィールカード機能を追加
プロフィールカードというのは、こういうデザインのカードです。
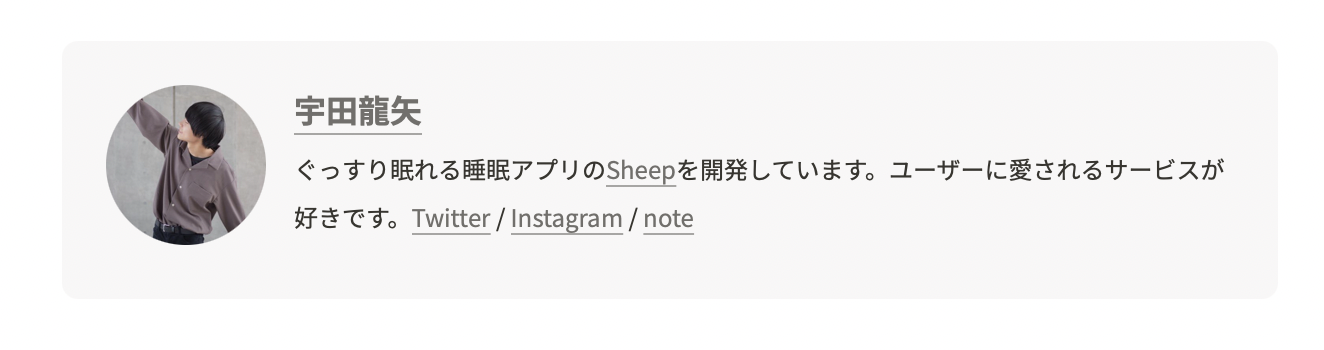
Notionには、デフォルトでこんなカード機能が用意されていないため、CalloutとカスタムCSSを使って作ってみました。

このデザインの仕組みは、 上の画像のようにCalloutの左のアイコン部分にプロフィール画像を使い、中身にプロフィール文を書いています。
カスタムCSSで画像を大きく、丸く変更することでプロフィールカードを実現しています。
とはいえ、普通のCalloutも使いたいですよね。なので、コールアウトの背景が『ブラウン』の場合のみ、プロフィールカードに変わるようにしました。
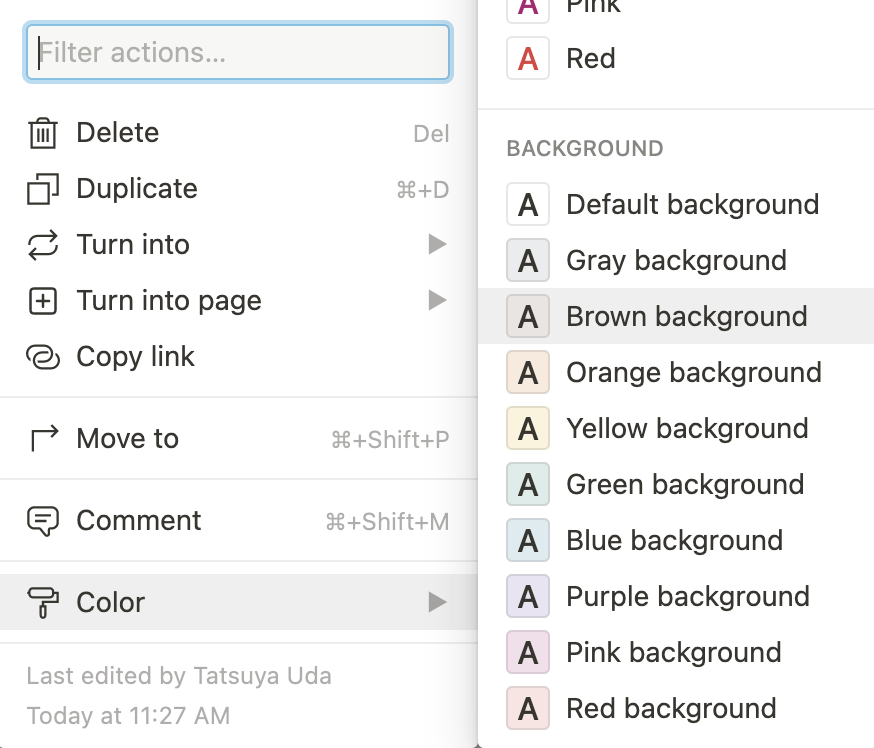
以下、CSSです。
<style>
	/* プロフィールカード(Callout + ブラウンカラーの場合のみ)*/
	.notion-callout.bg-brown-light .notion-callout__content .notion-semantic-string span:nth-child(1) {
	    margin-bottom: 4px !important;
	    display: block !important;
	}

	.notion-callout.bg-brown-light .notion-callout__content .notion-semantic-string span:not(:nth-child(1)) {
	    display: inline;
	    font-size: 12px;
	}

	.notion-callout.bg-brown-light .notion-callout__icon div {
	    width: 80px !important;
	    height: 80px !important;
	    border-radius: 60px;
	}

	.notion-callout.bg-brown-light .notion-callout__icon {
	    width: max-content !important;
	    margin-right: 6px;
	}

	.notion-callout.bg-brown-light {
	    border-radius: 8px !important;
	    border: none !important;
	    padding: 22px !important;
	}
</style>このCalloutを、 グローバルブロック化 して、全てのブログ記事のフッターとして使っています。
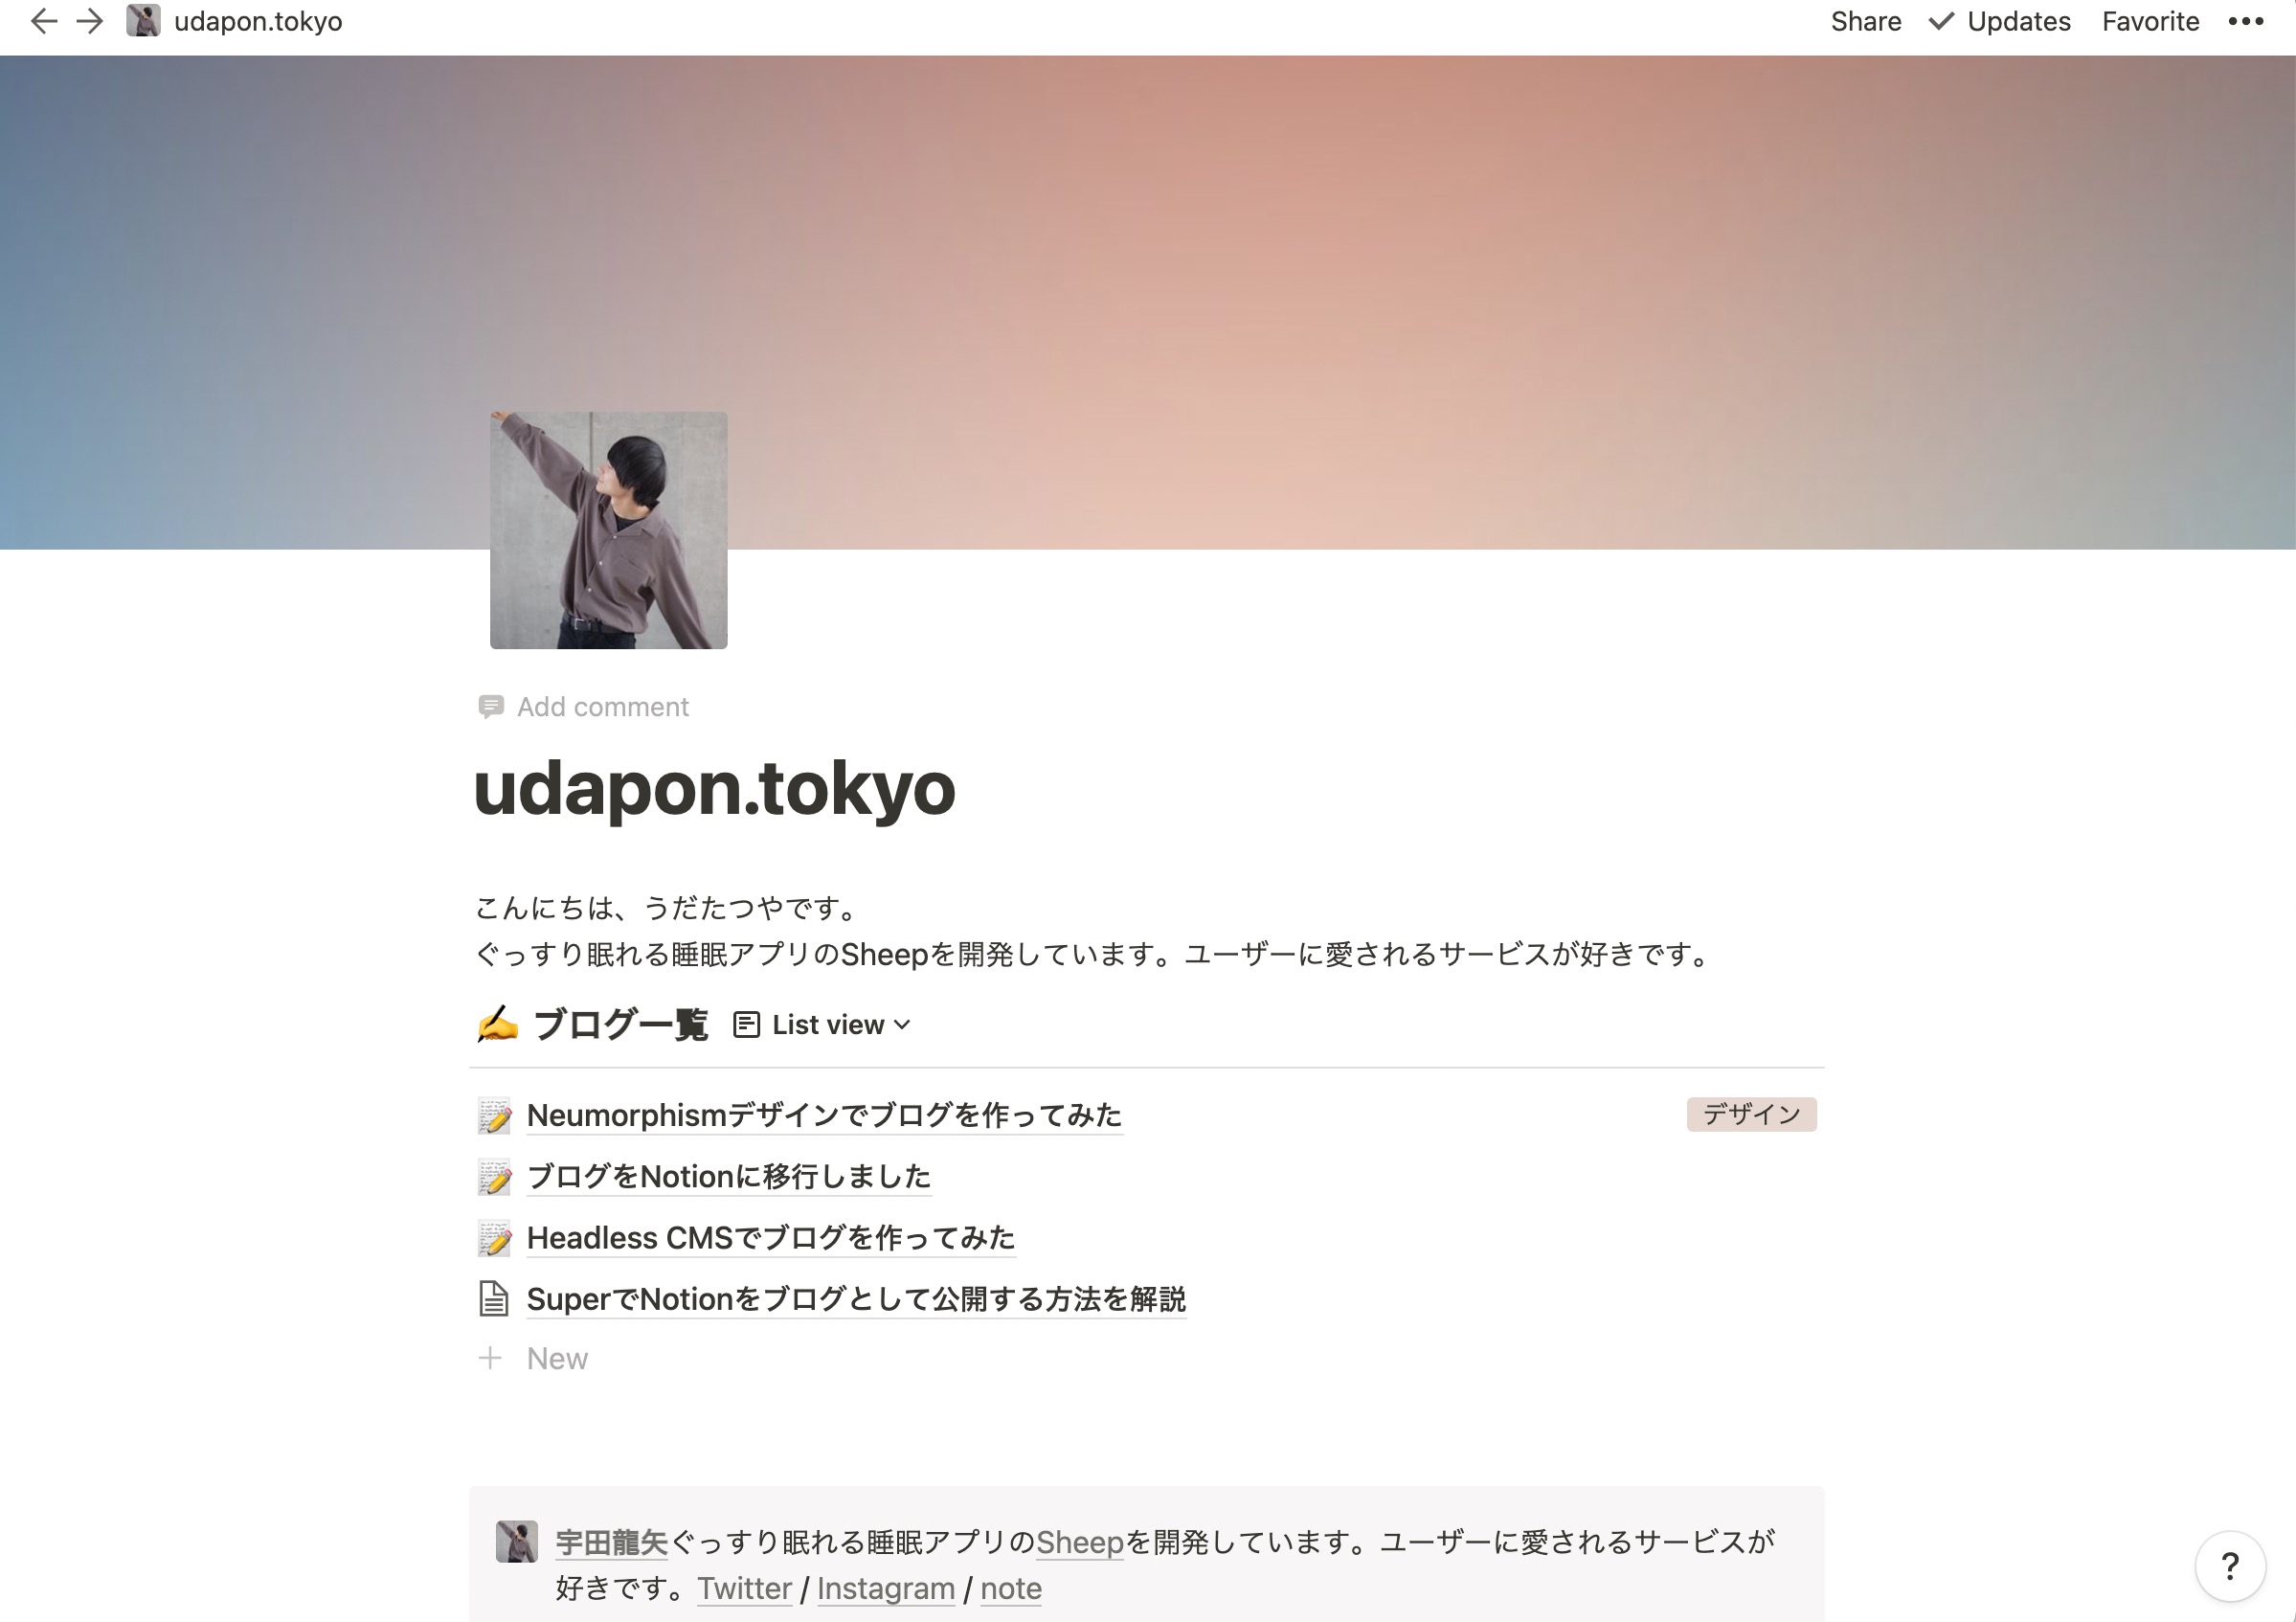
ブログ一覧(ギャラリー)のデザインをブログっぽく
Notionのギャラリーのデザインはこんな感じですよね。
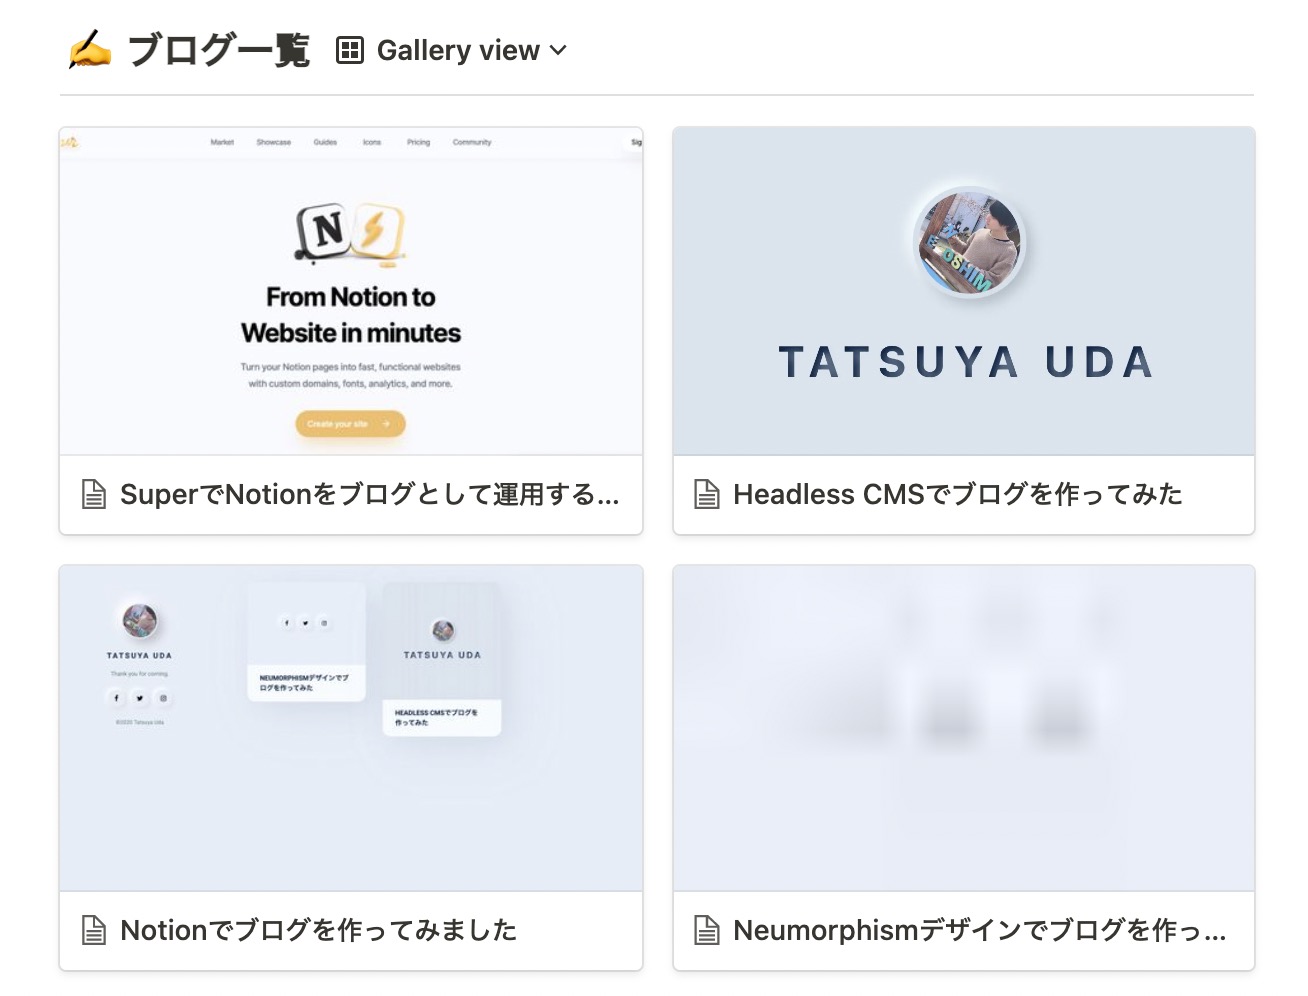
これも悪くはないですが、ブログのタイトルが隠れてしまったり、無駄なアイコンが表示されてしまっています。これをカスタムCSSで修正してみました。
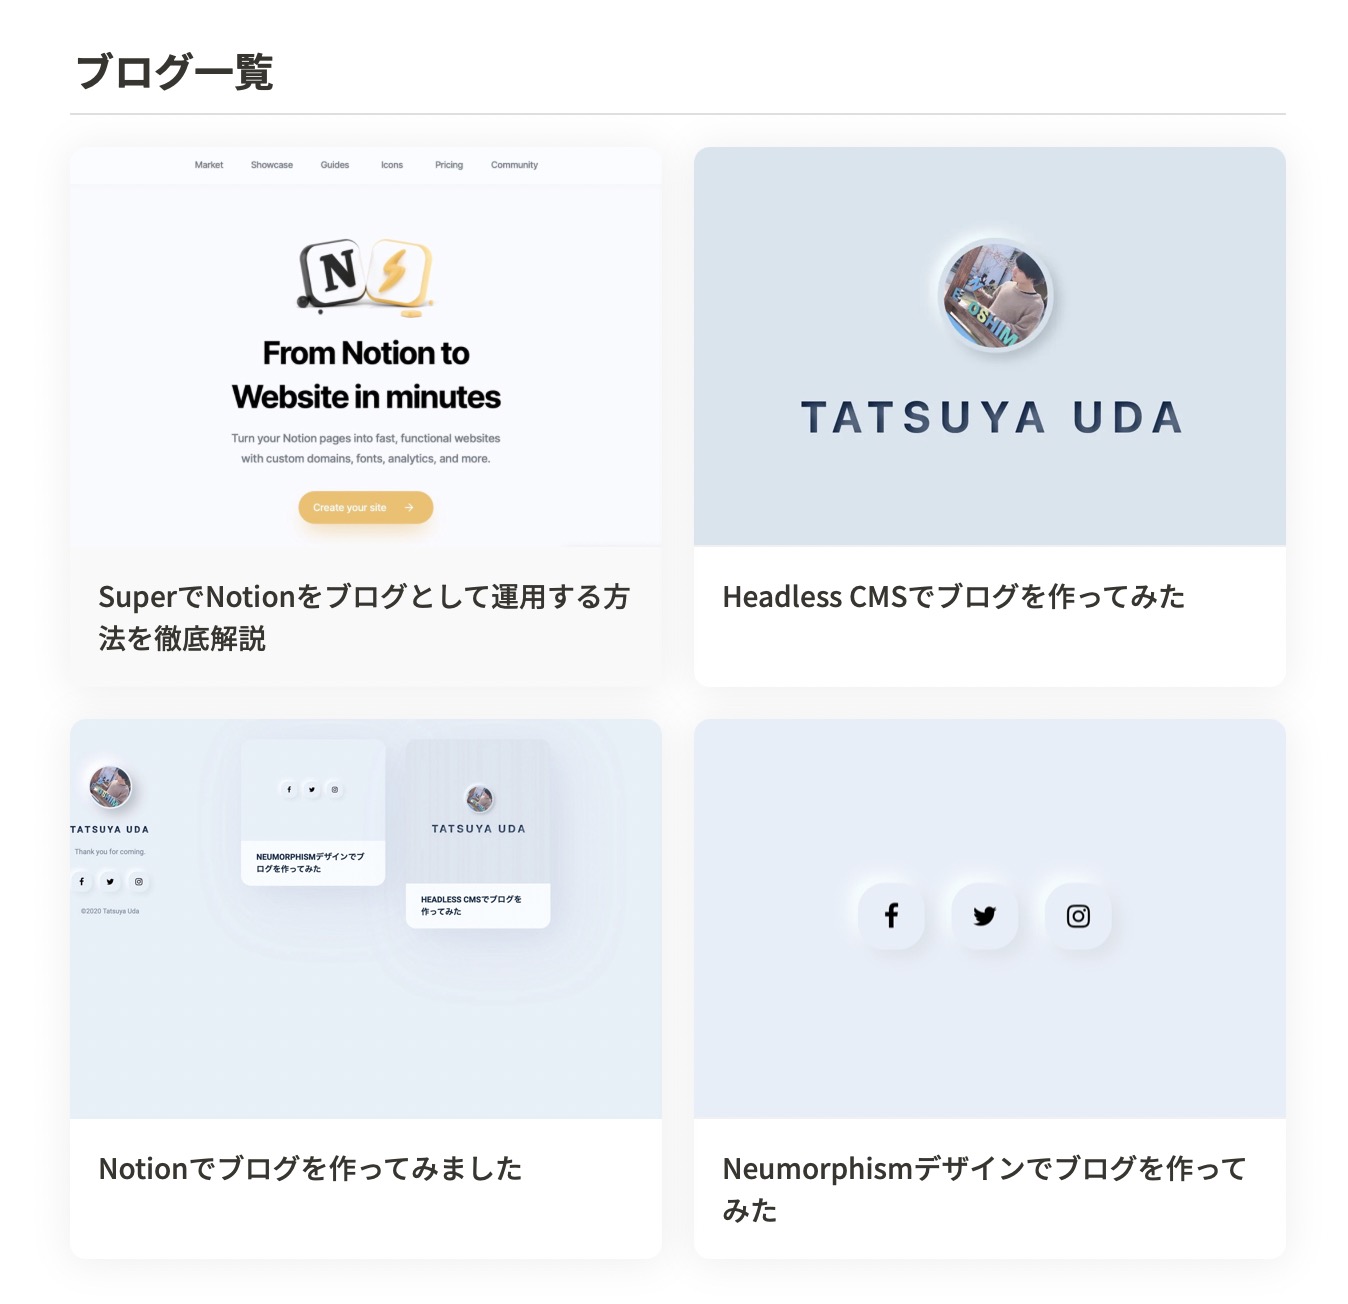
タイトルが全て表示され、アイコンも非表示になったのでみやすくなりましたね。
以下、CSSです。
<style>
	/* ブログ一覧のアイコンを非表示 */
	.notion-property__title__icon-wrapper {
	    display: none !important;
	}

	/* ブログ一覧のシャドウを調整 */
	.notion-collection-card {
	    box-shadow: 0 1px 19px 2px #0000000f !important;
	    border-radius: 8px !important;
	}

	/* ブログ一覧のページタイトルのデザインをみやすく変更 */
	.notion-property.notion-property__title {
	    padding: 14px 14px !important;
	    font-size: 14px !important;
	}
	.notion-collection-card.gallery .notion-property__title .notion-semantic-string {
	    white-space: normal !important;
	}
</style>
吹き出しを追加(New)
吹き出しデザインを作ると、 記事の大事な部分を強調できてみやすくなります。
WordPressではショートコードを使って実現することが多い吹き出しですが、 NotionならCalloutを使って実現できてしまいます。

また、こちらも、全てのCalloutが吹き出しになってしまうと困るため、 Calloutの背景色をGreen(緑)にすると、吹き出しに変わるようにCSSを書いてみました!
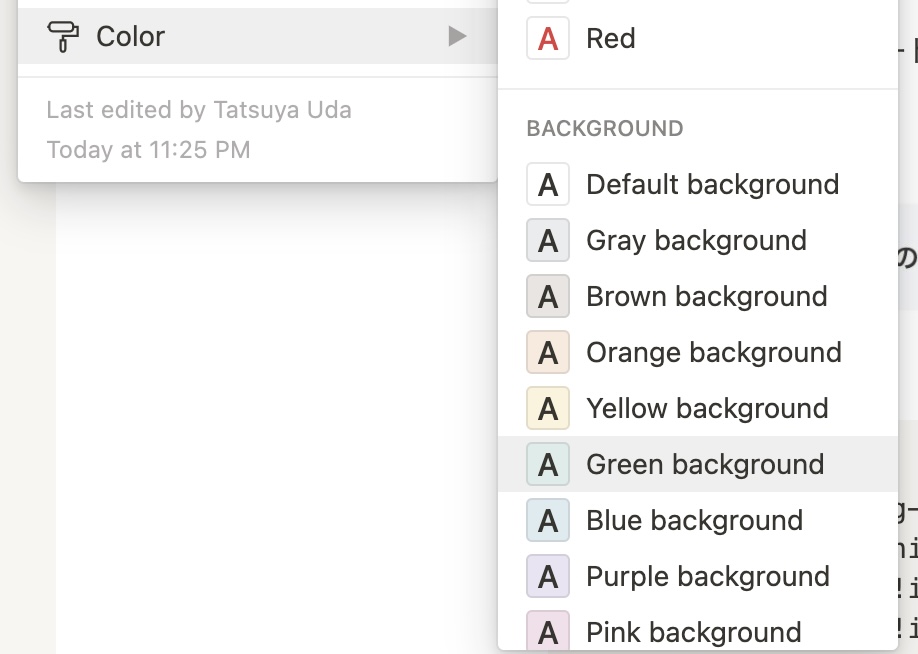
以下、CSSです。CSS内の〇〇の部分が表示名に対応しているので、お好きな名前を入れてください。
<style>
/* 吹き出し用CSS */
.notion-callout.bg-green-light {
    background: white !important;
    border: none !important;
    padding: 0px !important;
}

.notion-callout.bg-green-light .notion-callout__icon {
    min-width: 46px !important;
}

.notion-callout.bg-green-light .notion-callout__icon img {
    width: 100% !important;
    padding: 0px !important;
    height: 100% !important;
}

.notion-callout.bg-green-light .notion-callout__icon > * {
    width: 40px !important;
    height: 40px !important;
    border-radius: 50px;
    display: block;
    overflow: hidden;
    margin: 0px !important;
    padding: 0px !important;
}

.notion-callout.bg-green-light .notion-callout__content {
    margin: 0px;
    border: 1px solid #ddd;
    padding: 20px;
    border-radius: 6px;
    margin-left: 10px;
    position: relative;
}
.notion-callout.bg-green-light .notion-callout__content:after {
    content: "";
    display: inline-block;
    position: absolute;
    top: 11px;
    left: -16px;
    border: 8px solid transparent;
    border-right: 8px solid #ffffff;
}
.notion-callout.bg-green-light .notion-callout__content:before {
    content: "";
    display: inline-block;
    position: absolute;
    top: 10px;
    left: -19px;
    border: 9px solid transparent;
    border-right: 9px solid #dddddd;
}

/* 〇〇の部分を変えると、表示名が替わります。 */
.notion-callout.bg-green-light .notion-callout__icon:after {
    content: "〇〇";
    font-size: 10px;
    line-height: 1 !important;
    display: block;
    position: absolute;
}

</style>
他に、欲しいCSSがあればTwitterで連絡してください。順次追加していきます!
Notionのエディター画面のCSSもいじりたい人
こんな風に公開ページのCSSを編集してると、 エディターの表示もいじりたくなってきますよね。
公開ページで見ている内容と、入力している画面が違いすぎると困ってしまいます。 特に文章の行間が気になる・・・。
ただ、Notionの公式アプリには、カスタムCSSを挿入できる機能がありません。(これは、残念ながら実装されない気がします。)
そこで、 Mac版のNotionアプリを改造して、カスタムCSSを注入するコードを 書いてみました。
詳しいやり方は、 NotionのエディタにカスタムCSSを導入する方法を解説します! で紹介していますので、気になる方は読んでみてください!
追記:Super + Notionサイトのデメリット
Notionでブログを作り、2ヶ月ほど経過したので、Superを使ってNoitonブログを作ることのデメリットも解説してみます。
Super + Notionで作成したサイトは、SEO対策が難しく、オーガニック検索でアクセスを稼ぐようなサイトの作成には向かないなと感じました。
URLの登録が面倒
Notionで作ったページは、自動で公開されます。
しかし、URLが長い暗号のような文字列になってしまうため、 URLを綺麗にするにはSuperにアクセスして「Pretty URLs」の項目を設定する必要があります。
すぐに終わる作業なの問題ないのですが、大量のページを更新しようとなると大変そうです。 WordPressのように手軽にslugを変更できればありがたいのですが。
パンくずリストが微妙
Notionページでは、ヘッダーにパンくずリストが一応あります。しかし、スマホで表示させると、このリストがほとんど省略されてしまい、使い物になりません。
また、サイトはTOPページ→カテゴリーページ→投稿ページの3レイヤーになっていることが多いです。しかし、Superでは、第二レイヤーであるカテゴリーページのリンクが、スマホ表示の場合に消されてしまいます。最近のGoogleは、モバイル画面をクロールする場合がほとんどですので、きちんと3レイヤーで表示されると嬉しいのですが。
UX的な観点からもSEOの観点からも微妙です。
ギャラリーカードのアンカーテキストがない
Superではデータベースをギャラリービューにすることで、カテゴリーや記事の一覧表示が可能で便利です。しかし、調べてみるとSuperで生成されたギャラリービューのリンクは、アンカーテキストが存在せず、ギャラリービューの画像とテキストの上に、テキストの無いaタグが重なるような構造になっています。そのため、Googleにページ先の情報を伝えることができず、正しくクローリングされない可能性があり、SEO的な観点から見ると良くありません。
日付の表示ができない
Superでは、ページの作成日や更新日が表示できません。
プロパティ表示をONにすれば、ページに紐づいたデータを全て公開できるため、作成日や更新日も掲載できるにはできるのですが、公開チェックボックスや裏側で管理したいデータも全て公開されてしまうため、この方法は使いにくいです。
できれば、ページの作成日と更新日だけを表示させる機能があれば良いなと思いました。(UXの観点からもSEOの観点からも)
ページをnoindexにできない
Superでは、全てのページがindex対象になってしまいます。(もしくは全てのページをnoindexに)
そのため、特定のページをnoindex対象にすることができません。なので、薄っぺらいページを作るとサイトの評価に悪影響を与える可能性があります。
必要のないページがindexされる
Notionでは、データベースを作り、データを挿入すると、全てのデータに対して固有のページが生成される仕組みになっています。(たとえ、中身のテキストがなかったとしても)
Superは、そのようなテキストの無いページであったとしても、リンクを生成してしまうようです。そのような存在する意味のないページがGoogleにインデックスされており、これもSEOの観点から悪影響があります。
リンクをnofollowにできない
Noitonは、Webサイトの制作用に設計されていないため、当たり前なのですが、リンクにnofollowをつけることができません。これもまたSEO的な話になってしまうのですが、広告やアフィリエイトのリンクにはnofollowをつけなければいけません。(Googleのガイドラインを参照)
ブログを運営するのであれば、必須の機能なのですが、現状はリンクをnofollowにすることは不可能です。内部リンク以外は全てnofollowにする設定項目があれば良いと思うのですが、そんなニッチな設定が追加されるかどうかはわかりません。
Notion + Superでブログを作る方法まとめ
以上、Superを使ってNotionでブログを作り、運用で必要な機能の作り方などを解説しました。
Superが気になった方は こちら から設定してみてください。
皆さんの役に立てれば嬉しいです!質問などあれば、Twitterでご連絡ください。